
That one moment in time, Death Valley National Park / Rebecca Latson
Eleven years ago, I met Kurt Repanshek, Founder and Editor-in-Chief for the National Parks Traveler, virtually through Flickr. Kurt chanced upon my Flickr page and liked my images and commentary well enough that he asked if I might like to volunteer images and writing for a monthly national parks photo column on his site.
No, I’d not be getting paid a salary, and no, I’d never even heard of the National Parks Traveler. But the prospect of introducing myself, my photography, and my writing to a large section of the public on a monthly basis, using national parks as a background subject around which I could center my photography knowledge, was too grand to pass up!
Prior to meeting Kurt and the Traveler, I’d visited quite a few units within the National Park System already, and this was good reason to continue visiting more units (although does anybody really need a reason to visit a national park other than to see and learn about the beauty of that park unit?).
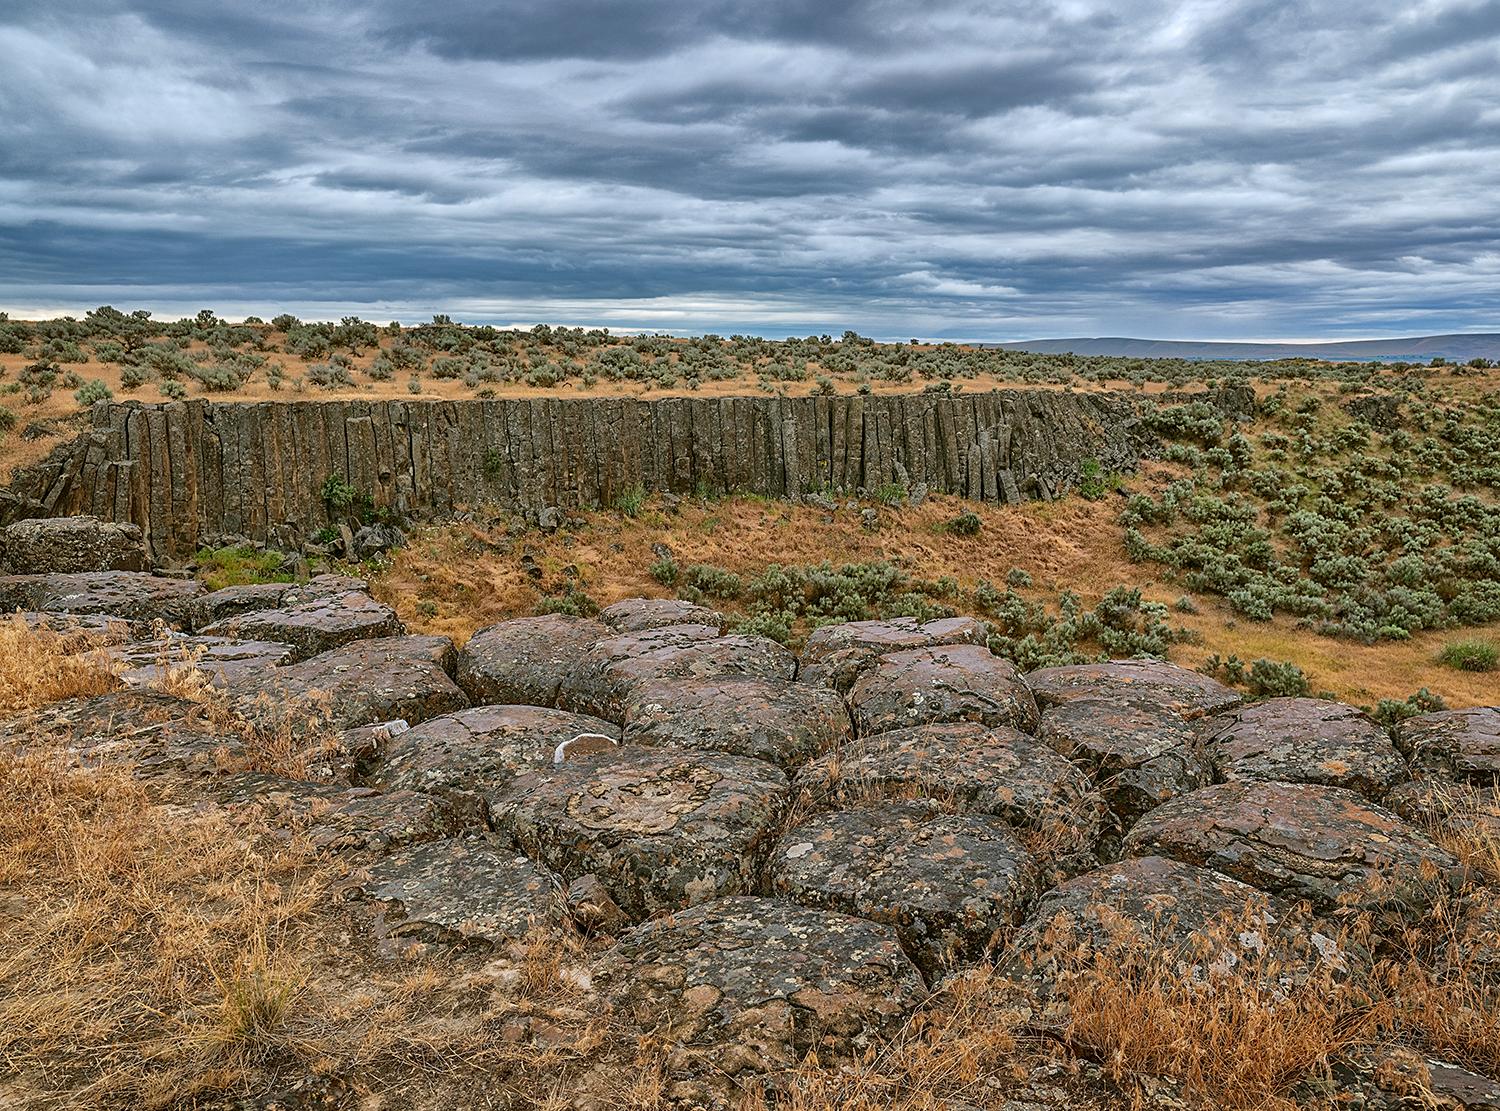
Columnar basalts at Drumheller Channels National Natural Landmark along the Ice Age Floods National Geologic Trail / Rebecca Latson
As of this date, I’ve visited Acadia, Arches, Big Bend, Bryce Canyon, Canyonlands, Crater Lake, Death Valley, Denali, Glacier, Grand Canyon (North and South Rims), Grand Teton, Great Basin, Hawai’i Volcanoes, Katmai, Lake Clark, Lassen Volcanic, Mammoth Cave, Mesa Verde, Mount Rainier, North Cascades, Olympic, Petrified Forest, Redwood, Rocky Mountain, Yellowstone, Yosemite, and Zion national parks. I’ve visited Fort Vancouver National Historic Site, Glen Canyon National Recreation Area, John Day Fossil Beds National Monument, Lewis and Clark National Historical Park, Padre Island National Seashore, Whiskeytown National Recreation Area, and traveled along the Washington state routes of the Ice Age Floods National Geologic Trail and Lewis and Clark National Historic Trail. Internationally, I and my cameras have visited Banff, Jasper, Kootenay, Waterton Lakes and Yoho national parks in Canada, and Killarney and Connemara national parks in Ireland. A couple of these parks I visited during the film days and some of those film strips have been lost to the decades, which is why you don’t see any Mammoth Cave or Waterton Lakes imagery from me.
Like that New Year’s Eve year-in-review almost every television program and radio show produces, let’s review some of the things I’ve tried to pass on to you national parks photo buffs over the last 11 years.
Be observant. Photograph what interests you. Don’t just get your camera out because you see someone else out there with a camera. They might be photographing a slimy slug or something that does not interest you in the least.
Look for color, pattern, and texture in a composition. National parks are composed of, and encompass, these three items.
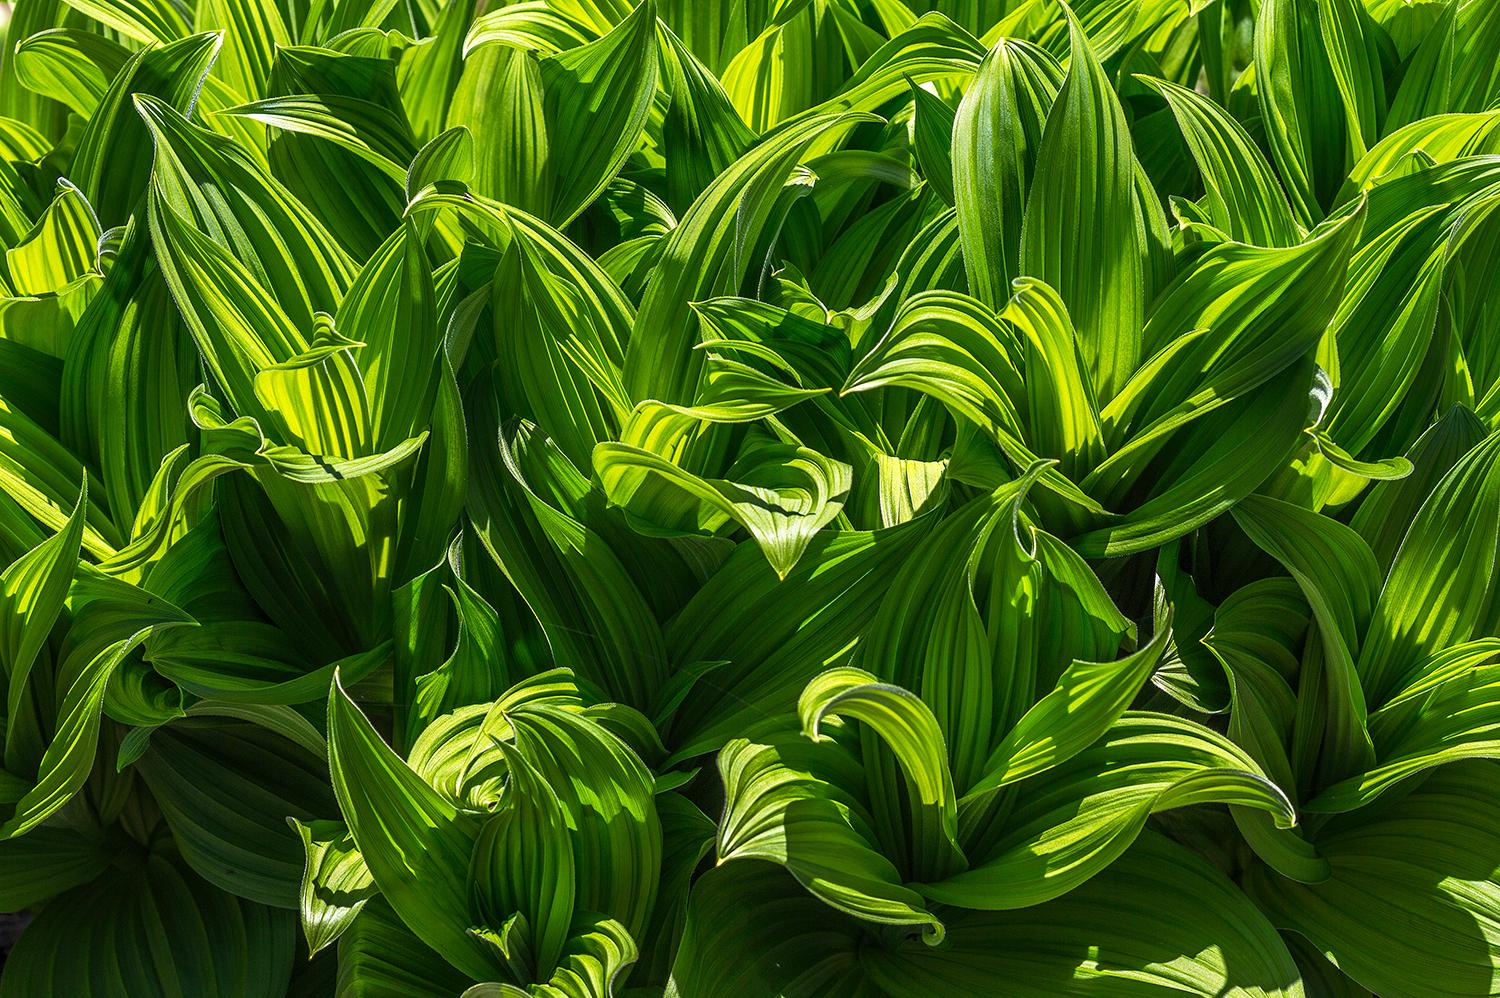
Saturated texture, Mount Rainier National Park / Rebecca Latson
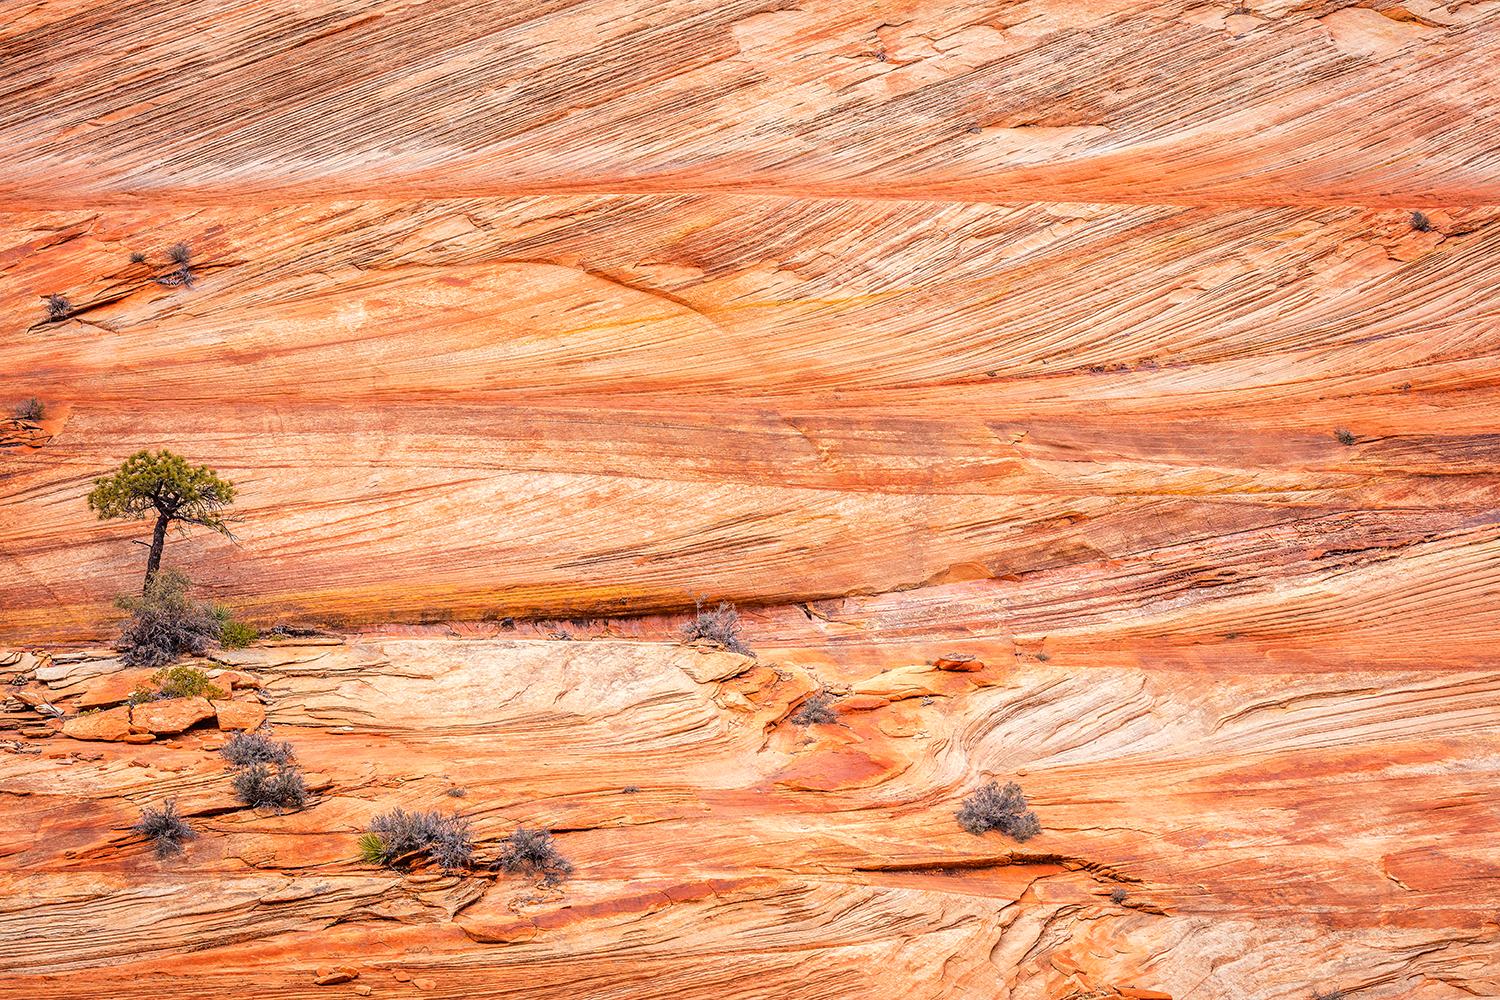
Lithified cross-bedded sand dune, Zion National Park / Rebecca Latson
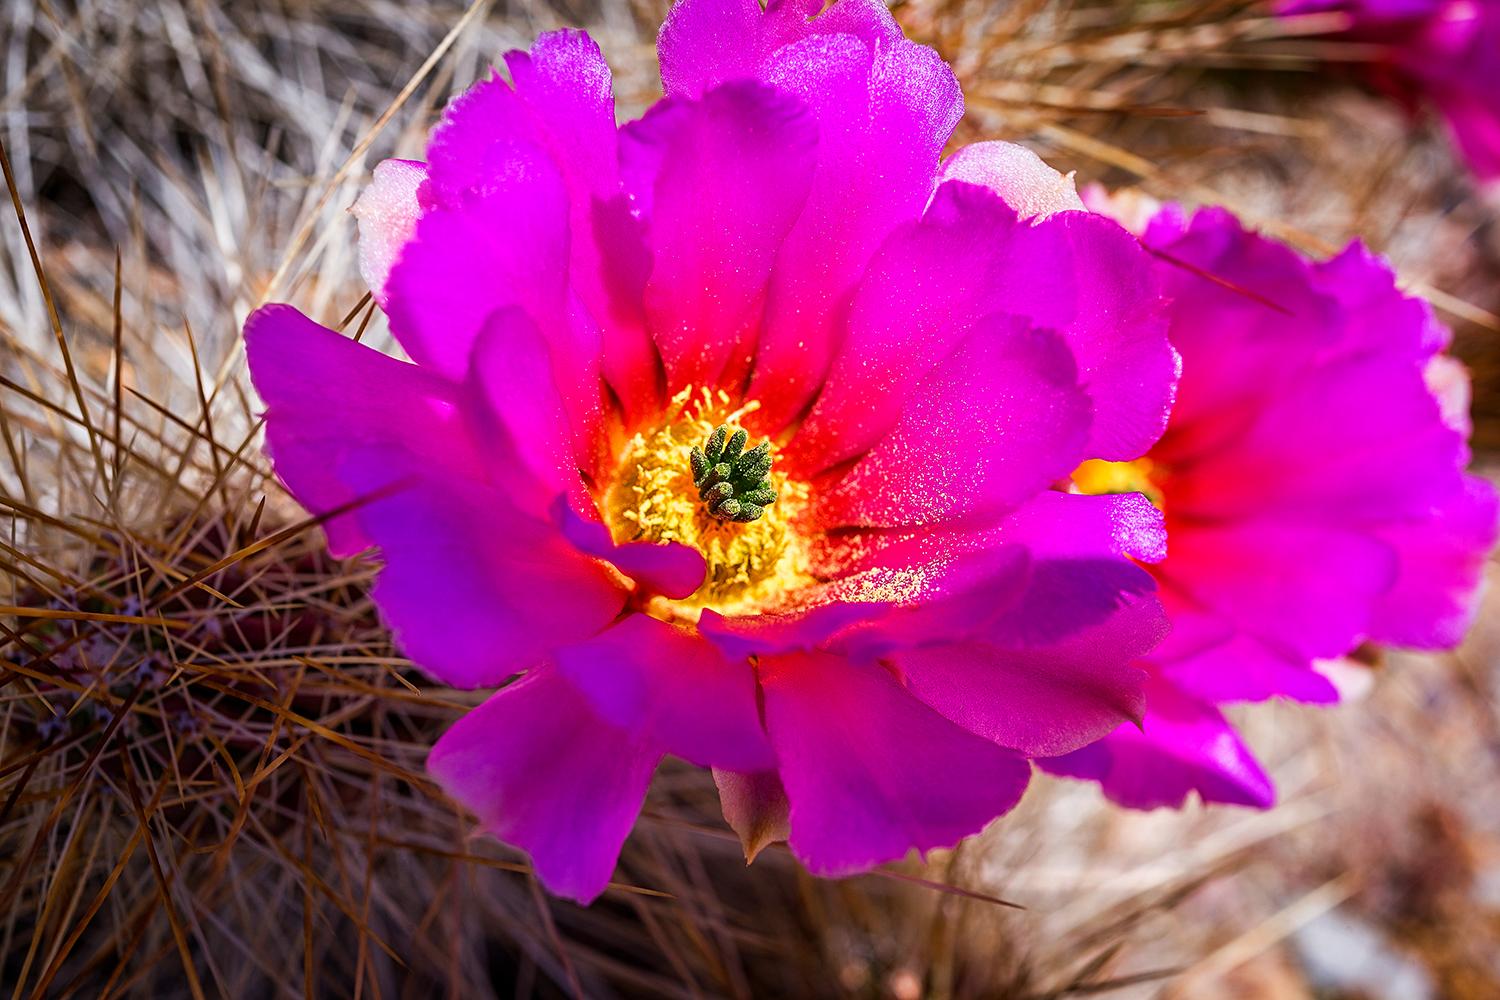
The bright, saturated magenta of a strawberry pitaya cactus bloom, Big Bend National Park / Rebecca Latson
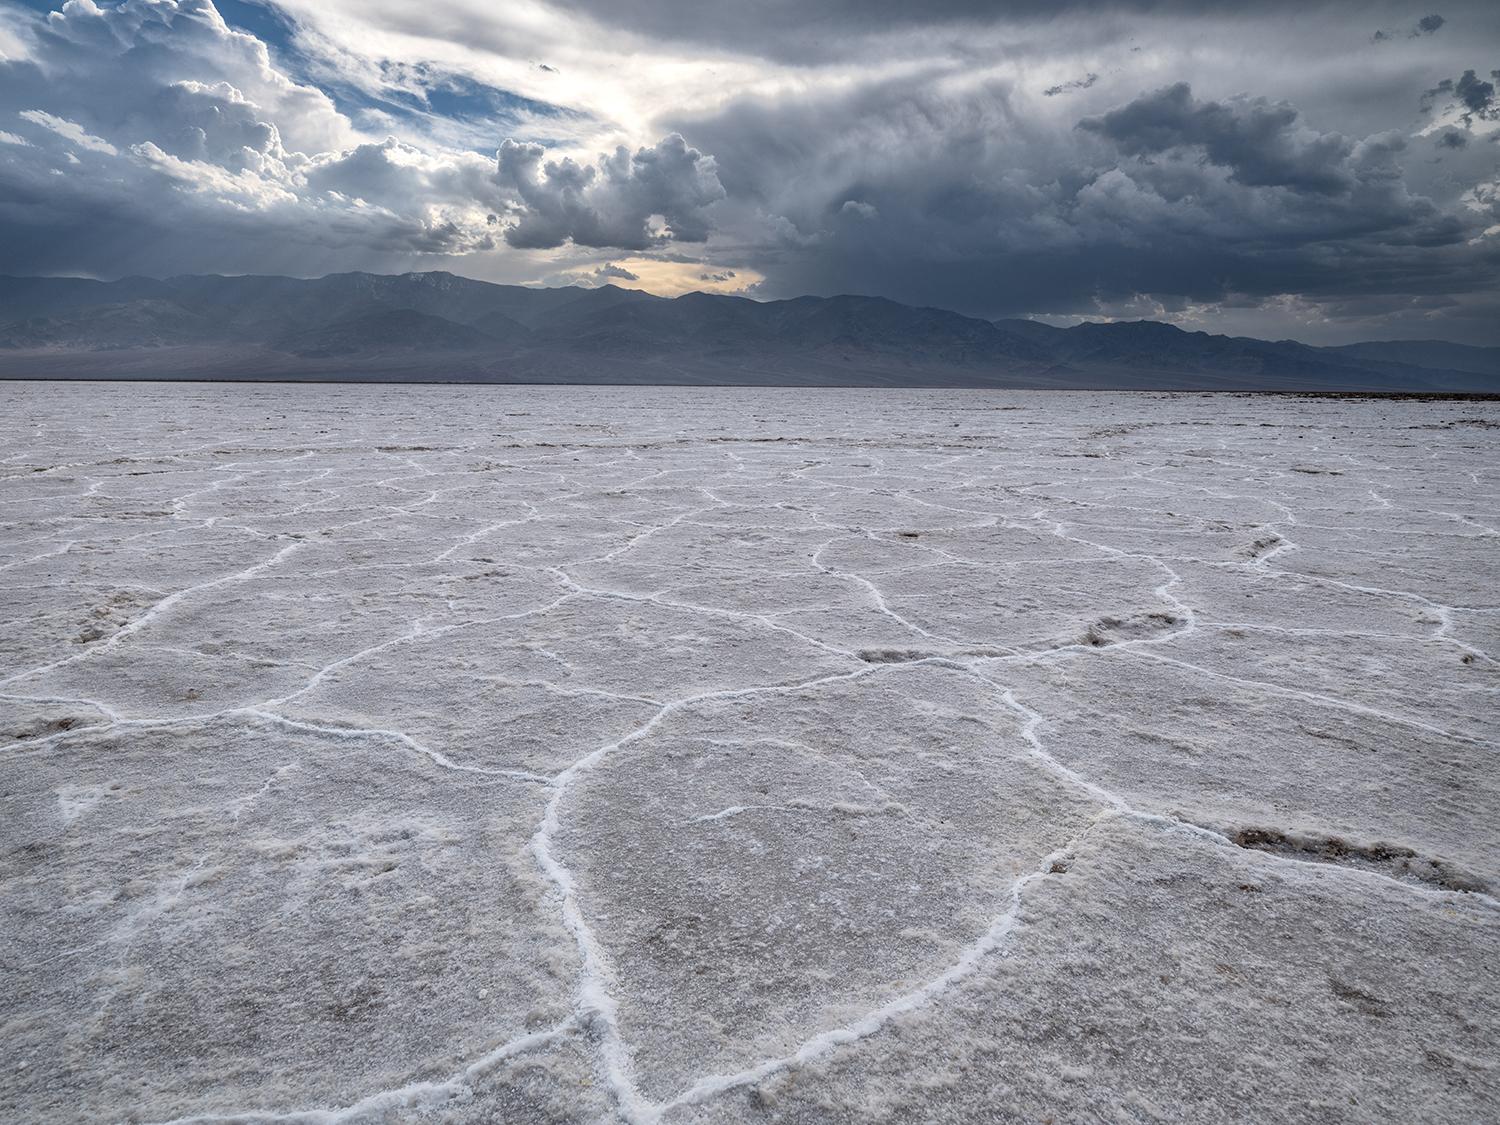
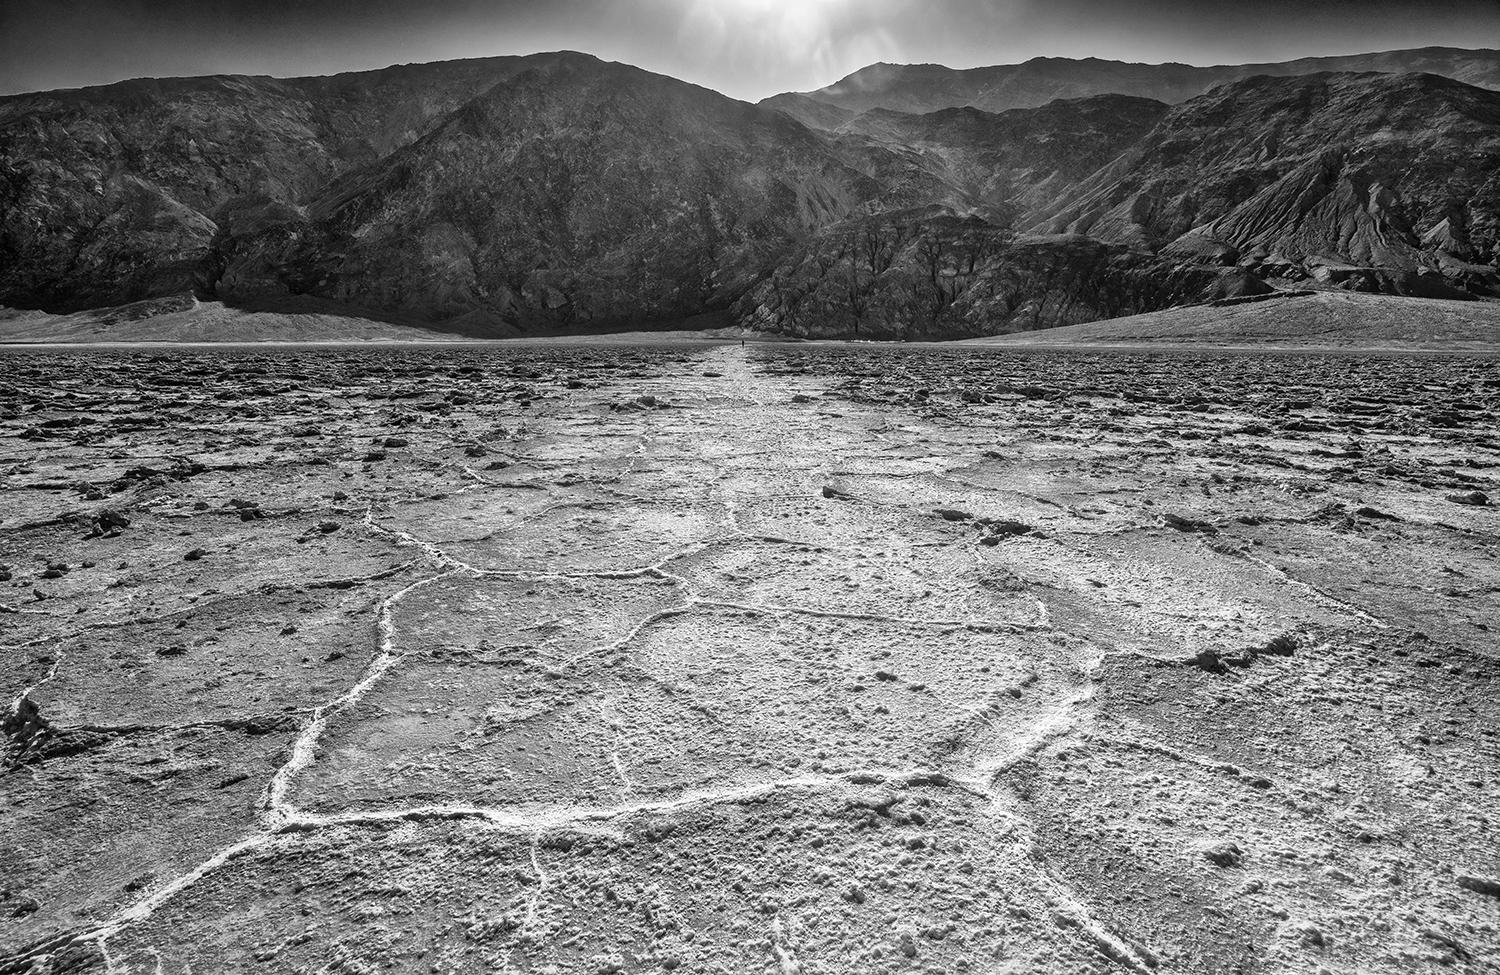
Salt flat patterning at Badwater Basin, Death Valley National Park / Rebecca Latson
Capture different perspectives of whatever interests you.
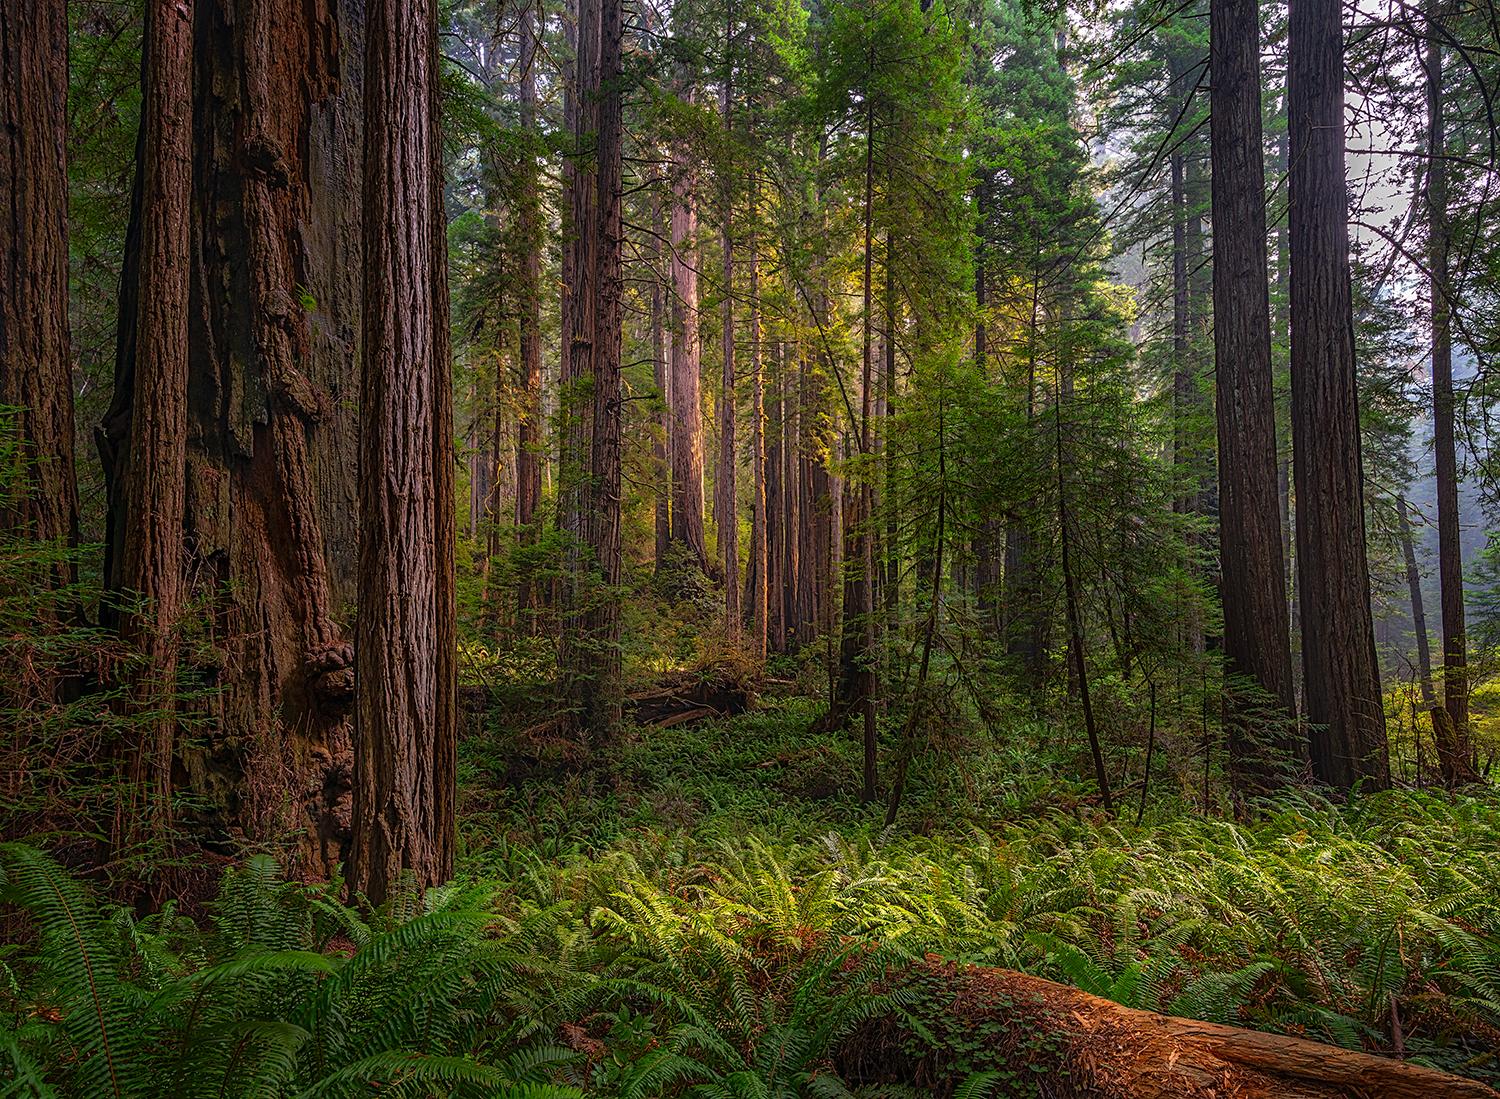
An eye-level view of coastal redwoods, Prairie Creek Redwoods State Park, Redwood National and State Parks / Rebecca Latson
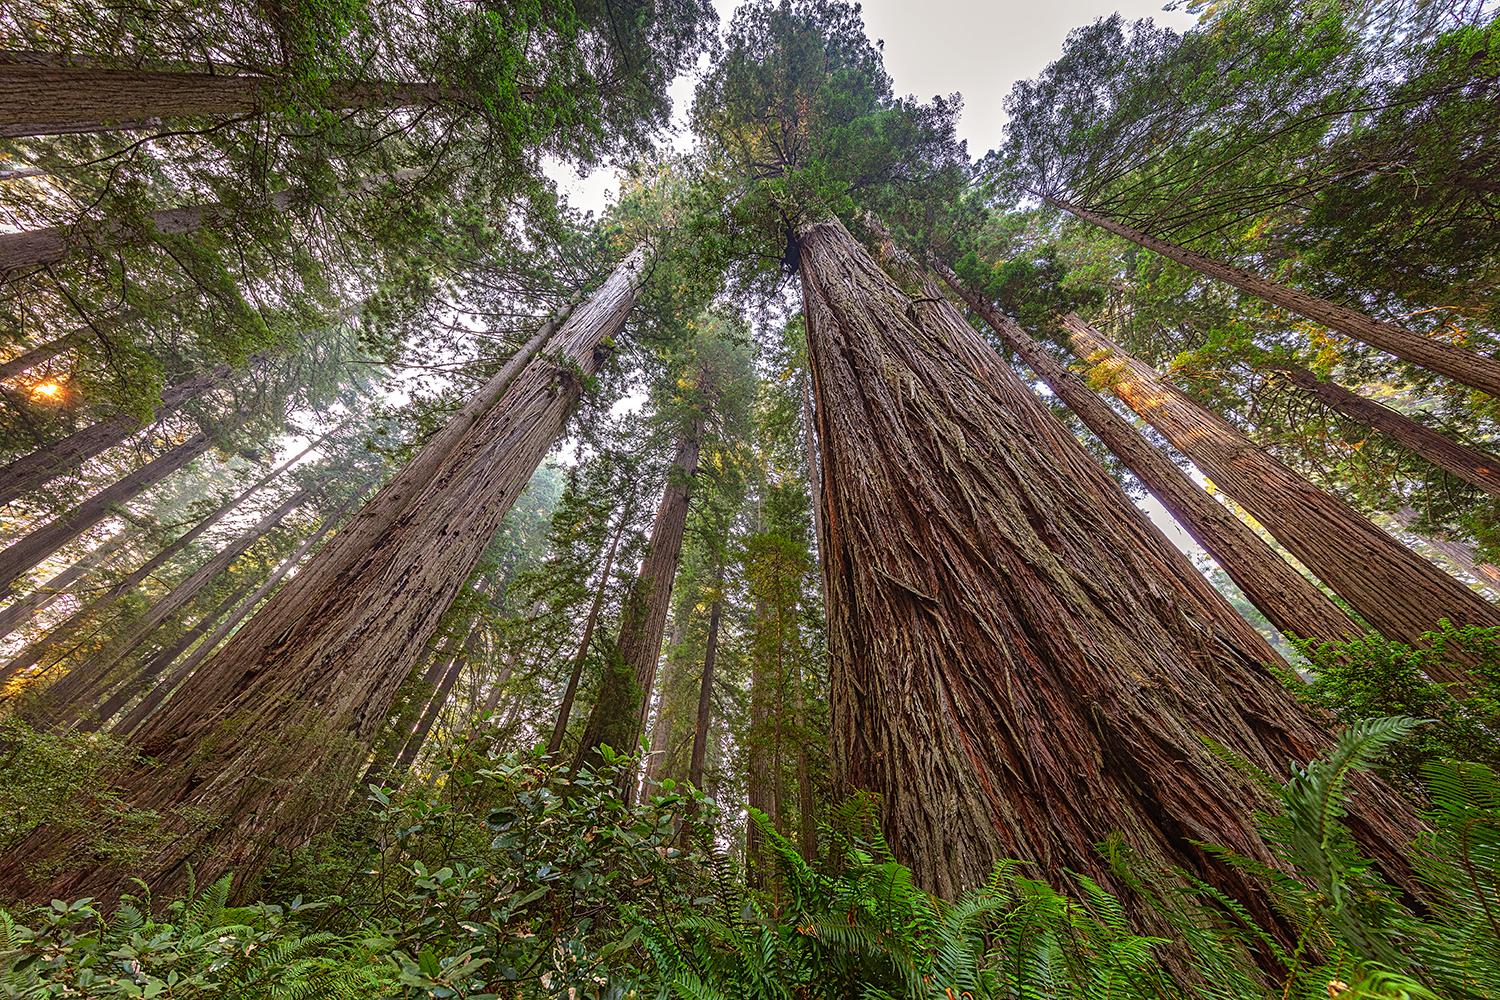
Looking up to the tree tops, Jedediah Smith Redwoods State Park, Redwood National and State Parks / Rebecca Latson
Big things and little things together and separately tell the story of a national park (and your visit to that national park), so photograph those little things in addition to the big things. They all come together to create the Big Picture. And no, you don't need to use a macro lens. I photograph the little things with my telephoto lens or my smartphone's telephoto / close-up setting.
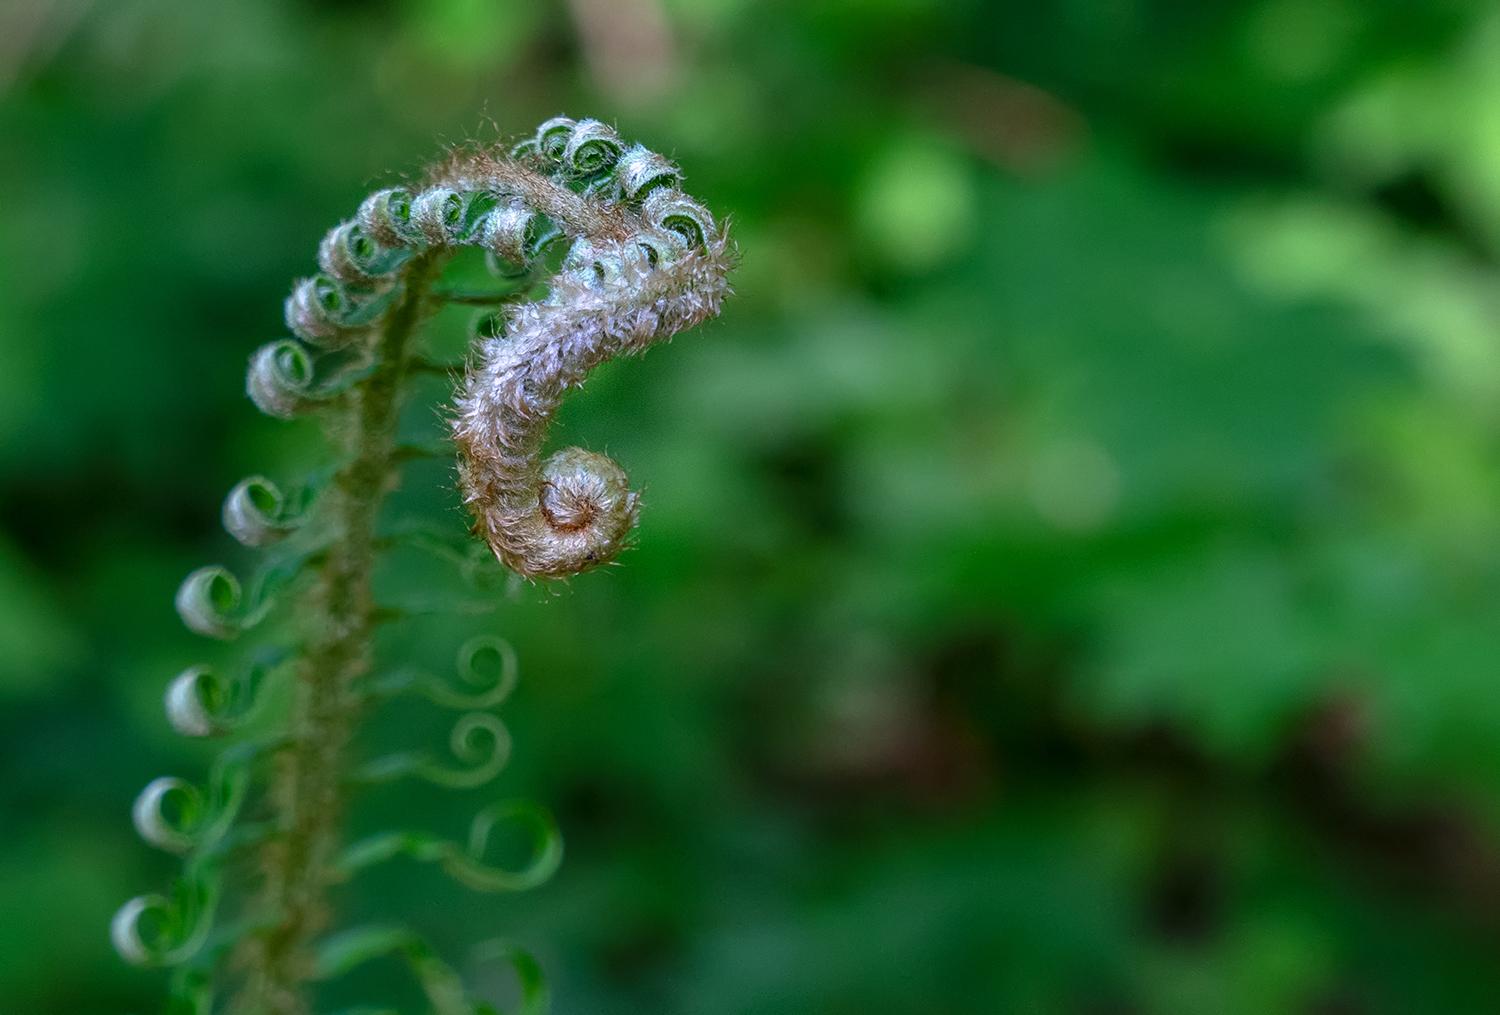
Unfurling fern, Beacon Rock State Park along the Lewis and Clark National Historic Trail / Rebecca Latson
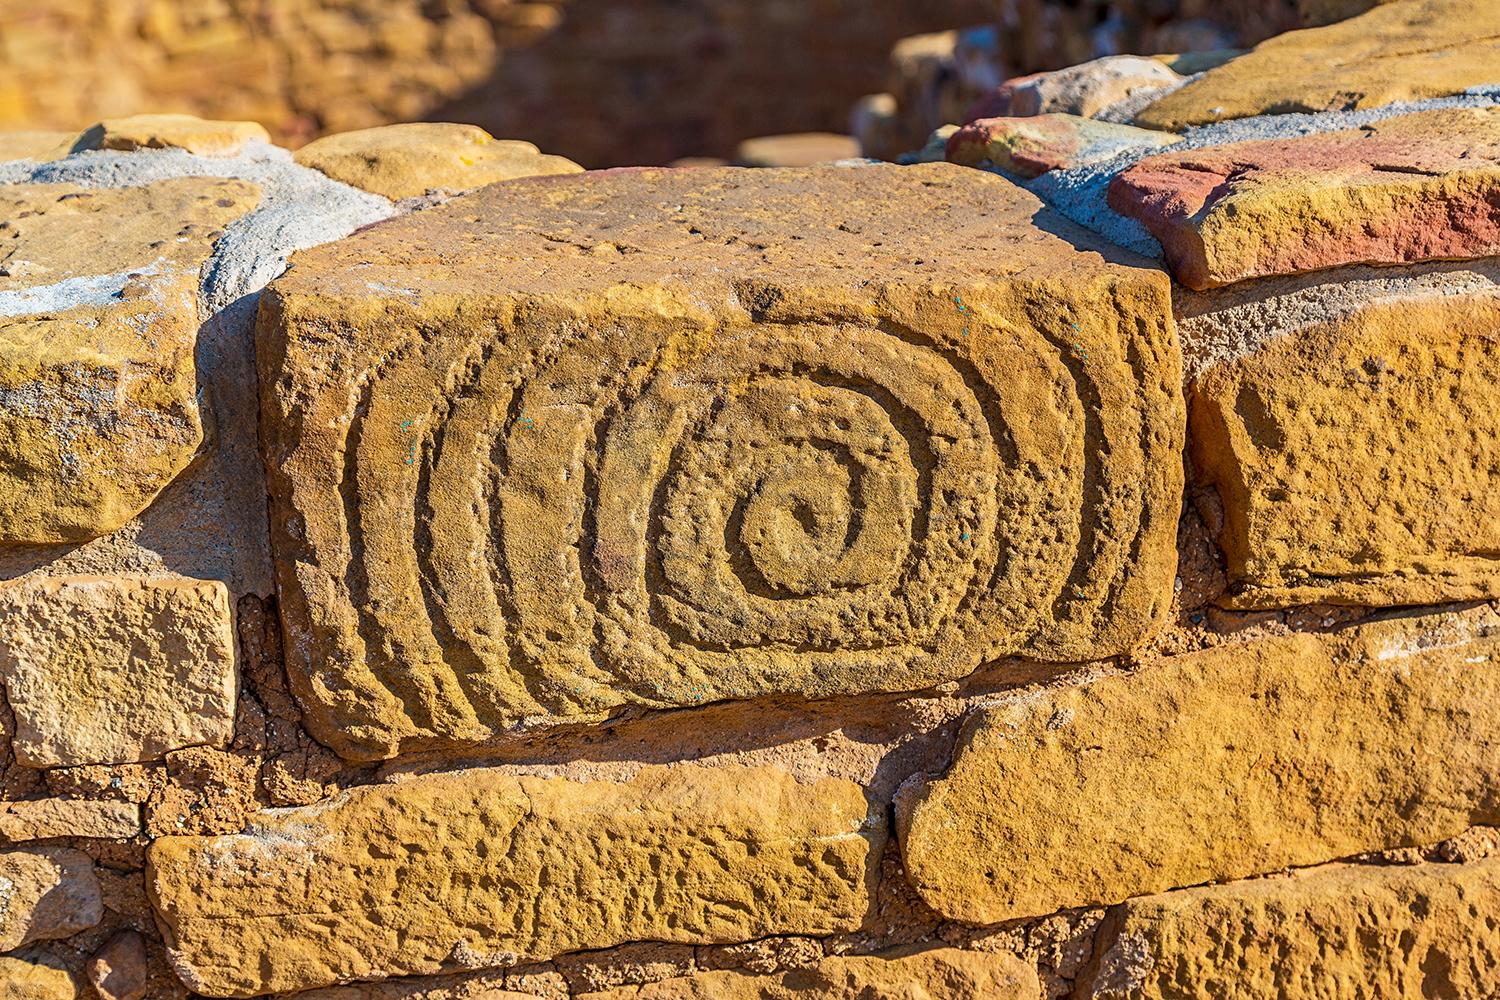
Spiral design in a brick at Far View Ruins, Mesa Verde National Park / Rebecca Latson
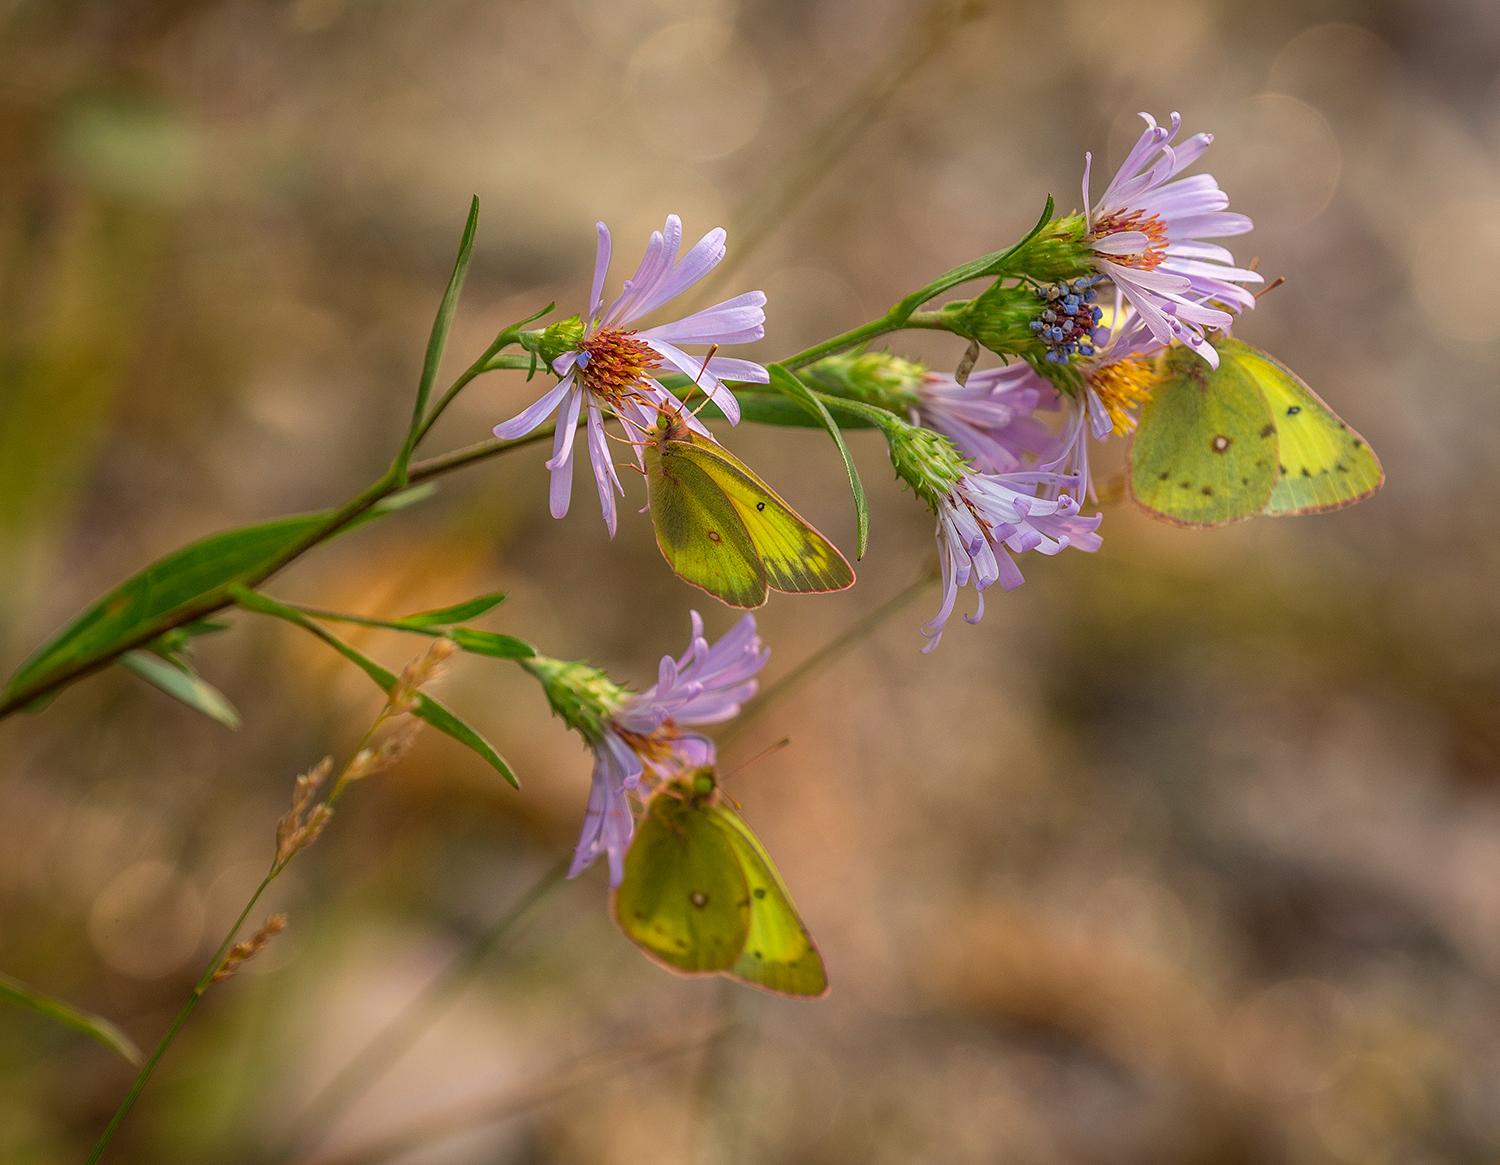
Purple and yellow, Glacier National Park / Rebecca Latson
Revisit favorite spots during different times of day, seasons, and weather conditions. You’ll be surprised at how different the same spot can look.
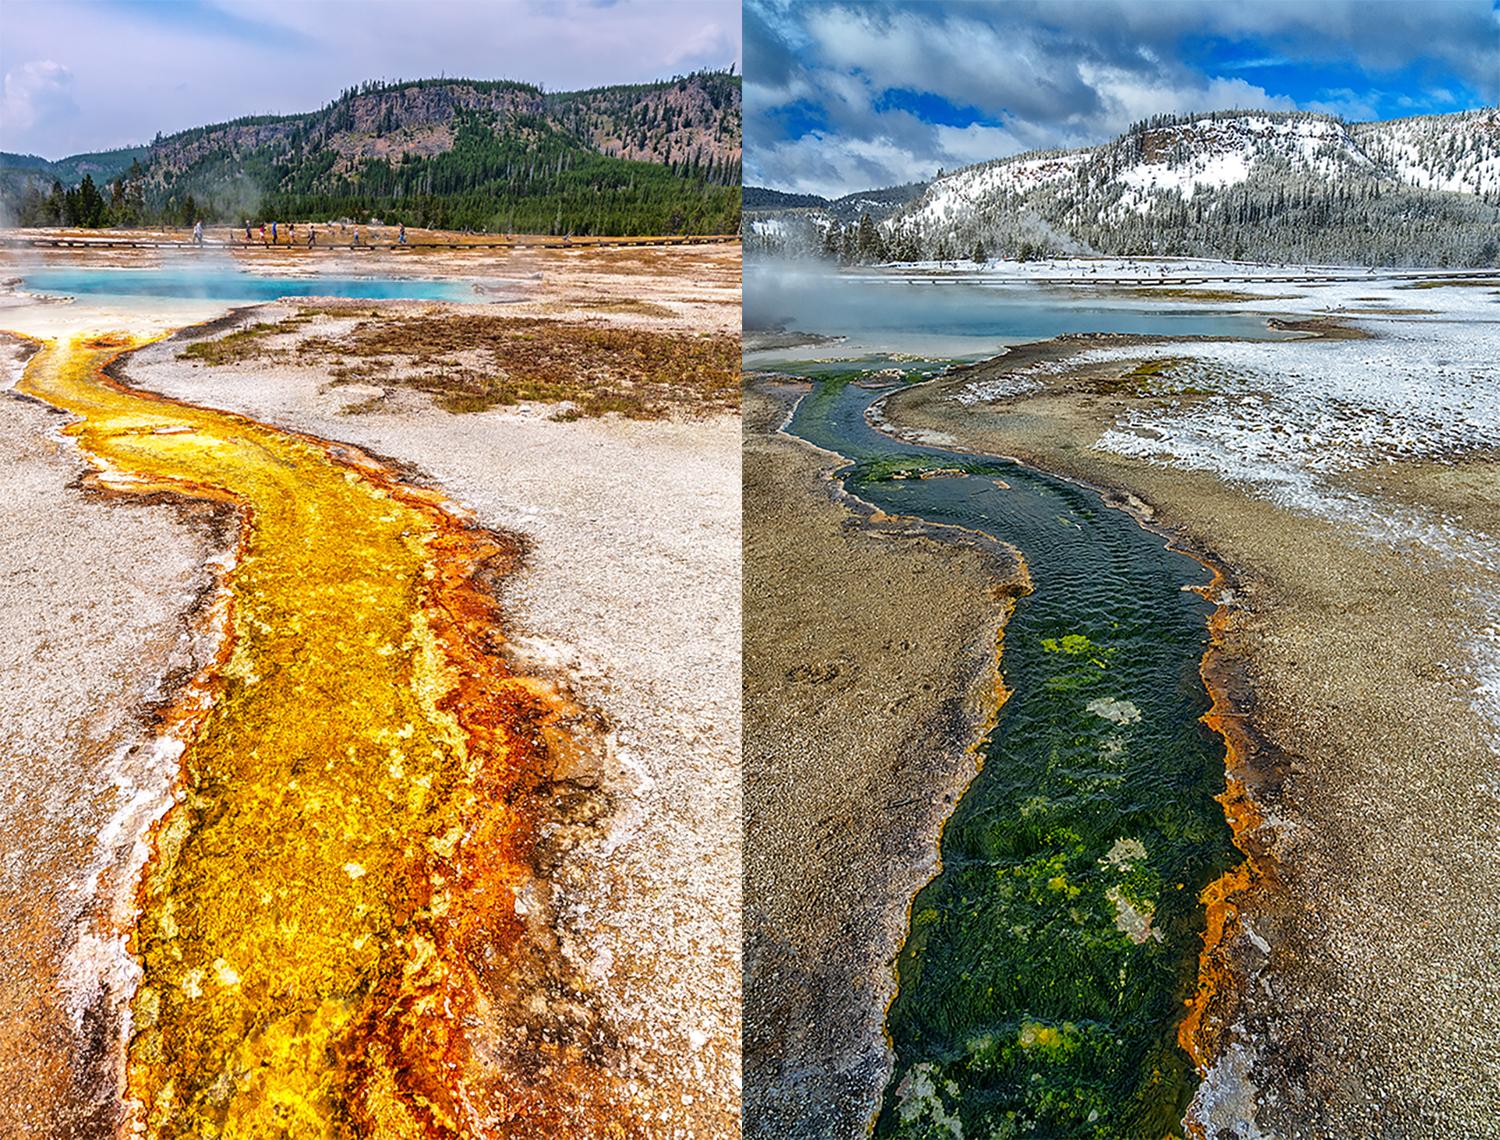
Summer and winter views of algae in a stream near a hot spring at Biscuit Basin, Yellowstone National Park / Rebecca Latson
Speaking of spots, make use of those pullouts and view areas. The NPS and Parks Canada built them for a reason.

Icefields Parkway landscape captured at a pullout. Notice the two "anchors"? Banff National Park / Rebecca Latson
Include "anchors" in your compositions. Anchors draw viewers to a specific spot and - like leading lines - move the eyes from that spot to other parts of the photo, then back again. In the case of the image above, captured at a view area along the Icefields Parkway in Banff National Park, the rugged, misty mountain is one anchor, and that small tree diagonally on the other side of the frame is another anchor.
There is beauty in simplicity, so occasionally photograph a simple composition.
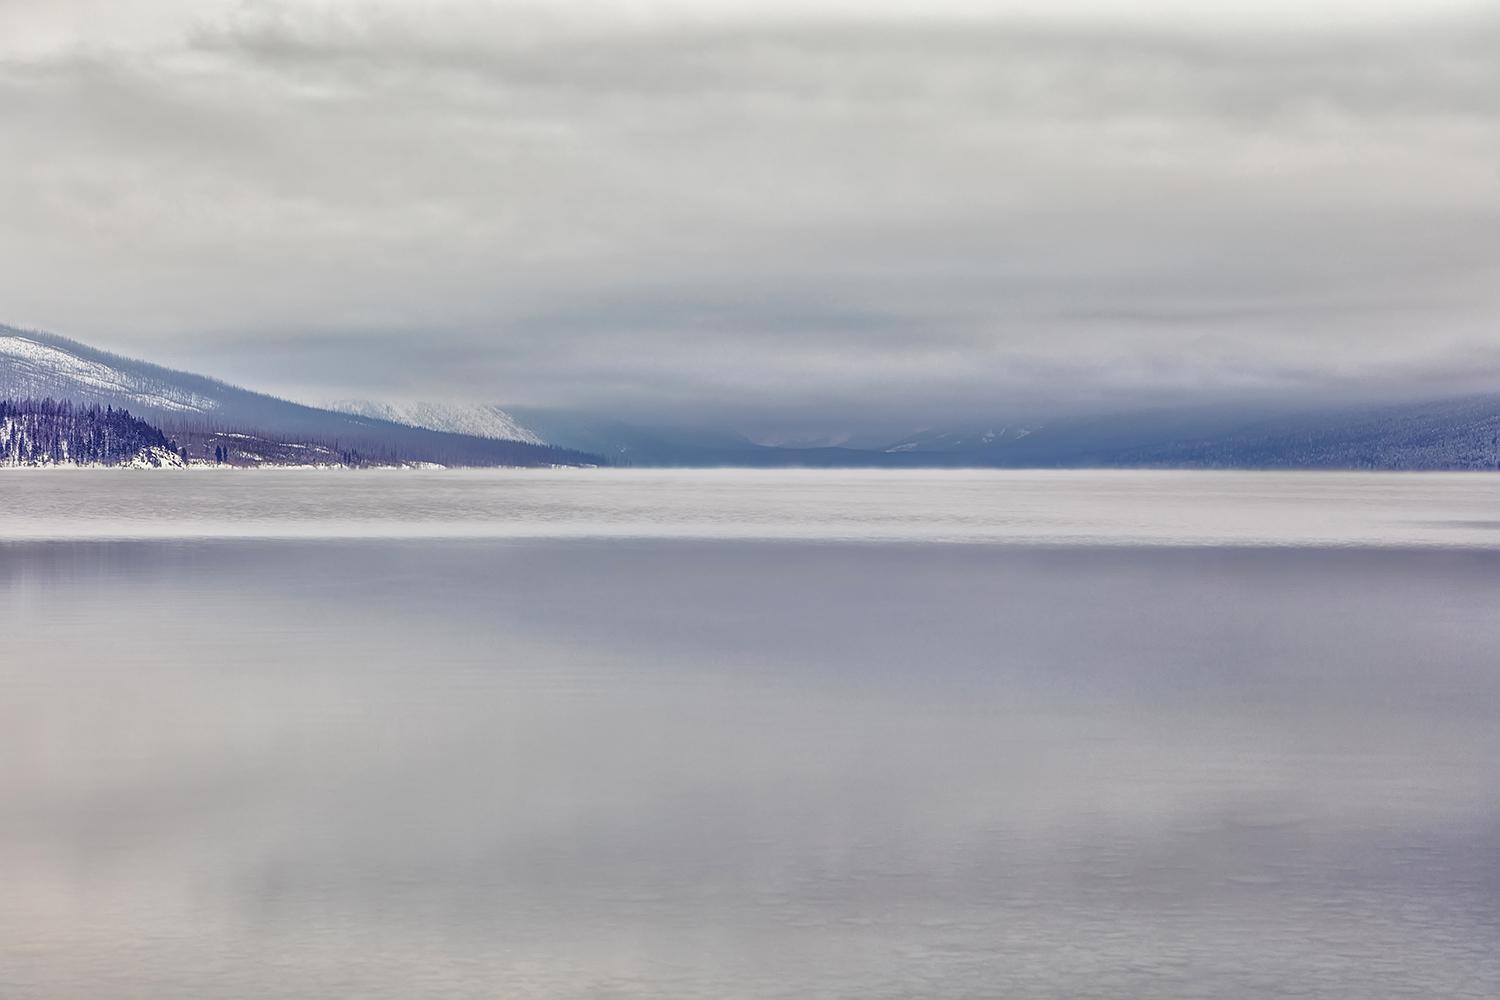
Mid-morning winter light over Lake McDonald, Glacier National Park / Rebecca Latson
Take what you are given on any day in the park and make something of it, even if it’s on a cloudy, overcast day or a smoky, hazy day due to wildfires. These days shouldn’t prevent you from capturing great photos. Clouds add texture and drama to a landscape, no matter what the weather, but especially during rainy weather, and haze from wildfires produce awesome sunrises and sunsets and create a moody, ethereal look to any given scene.

Midday clouds and reflections at Herbert Lake, Banff National Park / Rebecca Latson
A smoky morning at Mount Rainier National Park / Rebecca Latson
You might be in the right spot but not at the right time, perhaps arriving there during the harsh light of midday. Get creative with your photography. Make do with what you’ve got, and you’ll surprise yourself with great images.
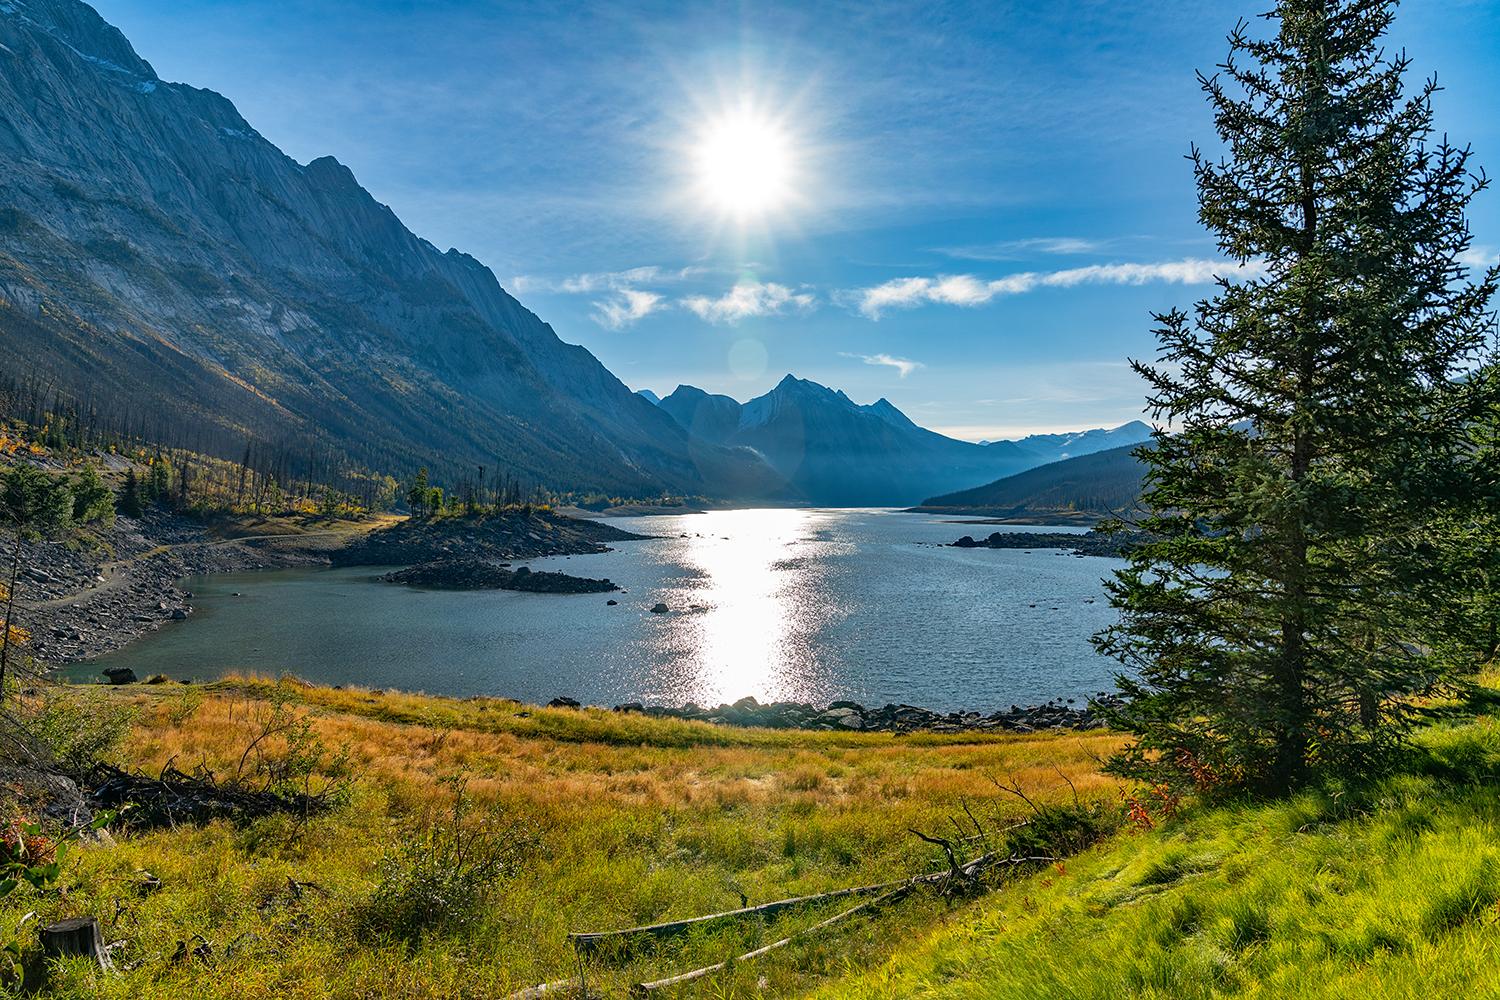
Medicine Lake landscape at midday, Jasper National Park / Rebecca Latson
Ensure your horizon lines are straight and you've "cloned out" (erased, or covered over) as many sensor spots as you might detect - usually you'll notice them in your "negative" or "white" spaces (areas around your subject like sky or ocean or other large, single color areas of the shot).
Capture some “golden hour” sunrise and sunset shots, because the lighting is truly magical. Get there early enough before sunrise or stay late enough after sunset to also photograph “blue hour,” when the atmosphere and landscape are bathed with paint strokes of blue, purple, pink, and mauve.
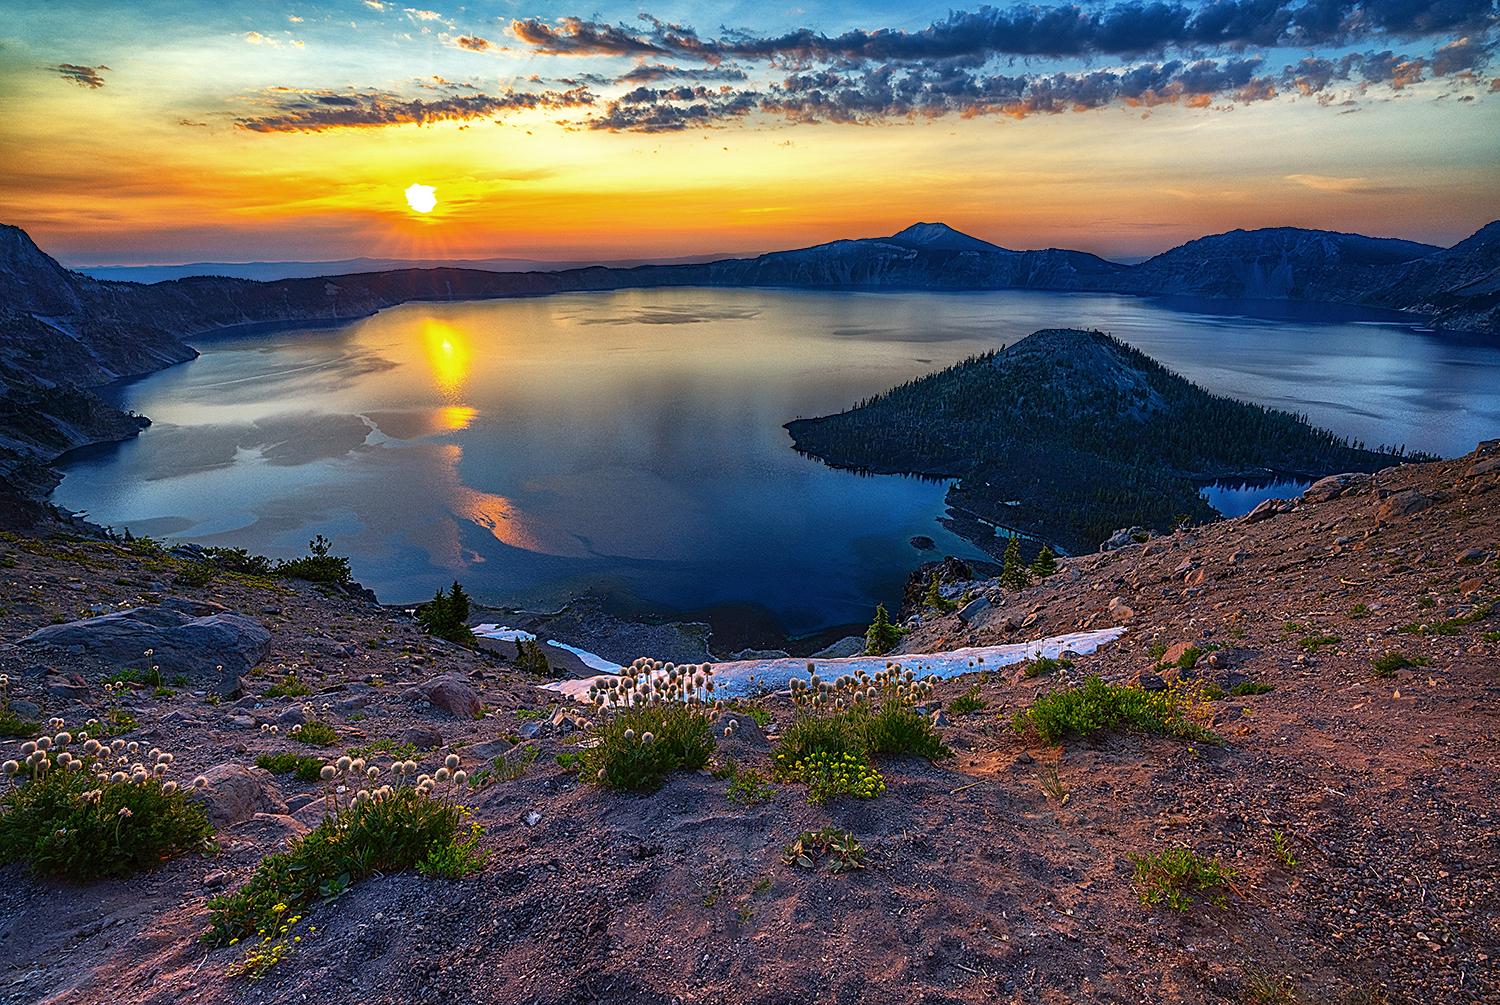
Sunrise over Crater Lake, Crater Lake National Park / Rebecca Latson
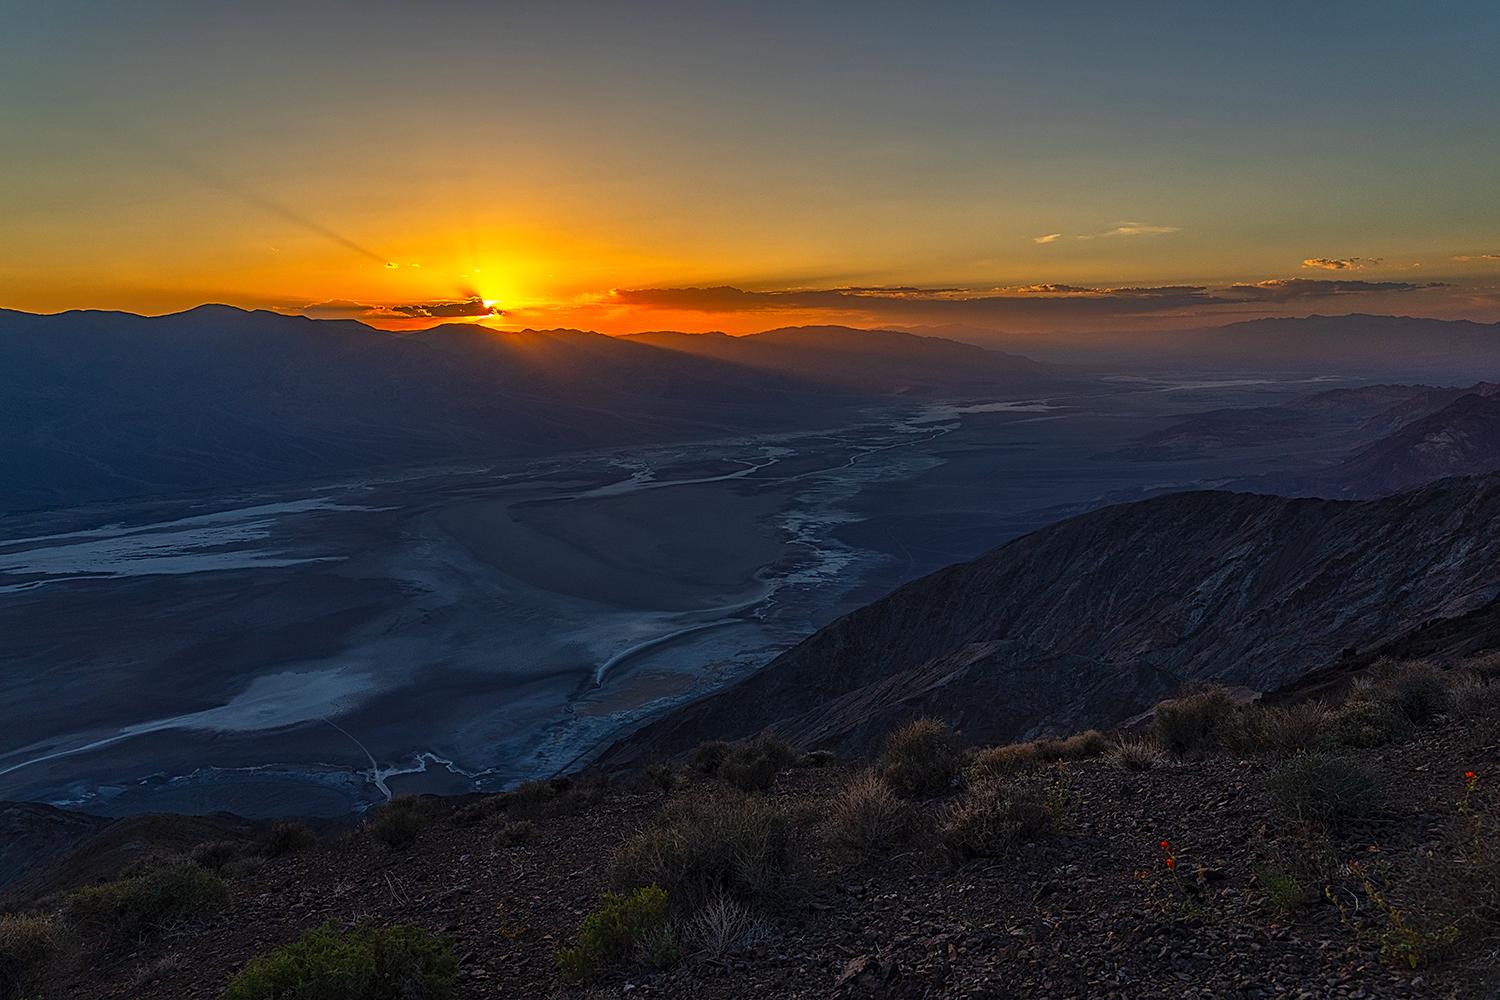
Sunset at Dantes View, Death Valley National Park / Rebecca Latson

A frosty "blue hour" over Tipsoo Lake and "The Mountain," Mount Rainier National Park / Rebecca Latson
Keep a safe distance from wildlife and use your telephoto lens or telephoto setting for a close-up. Don’t get between a bear sow and her cubs, don’t feed the wildlife (it’s just not good for them, habituates them to handouts, and makes them aggressive), and for heaven’s sake, don’t pet the fluffy cows.
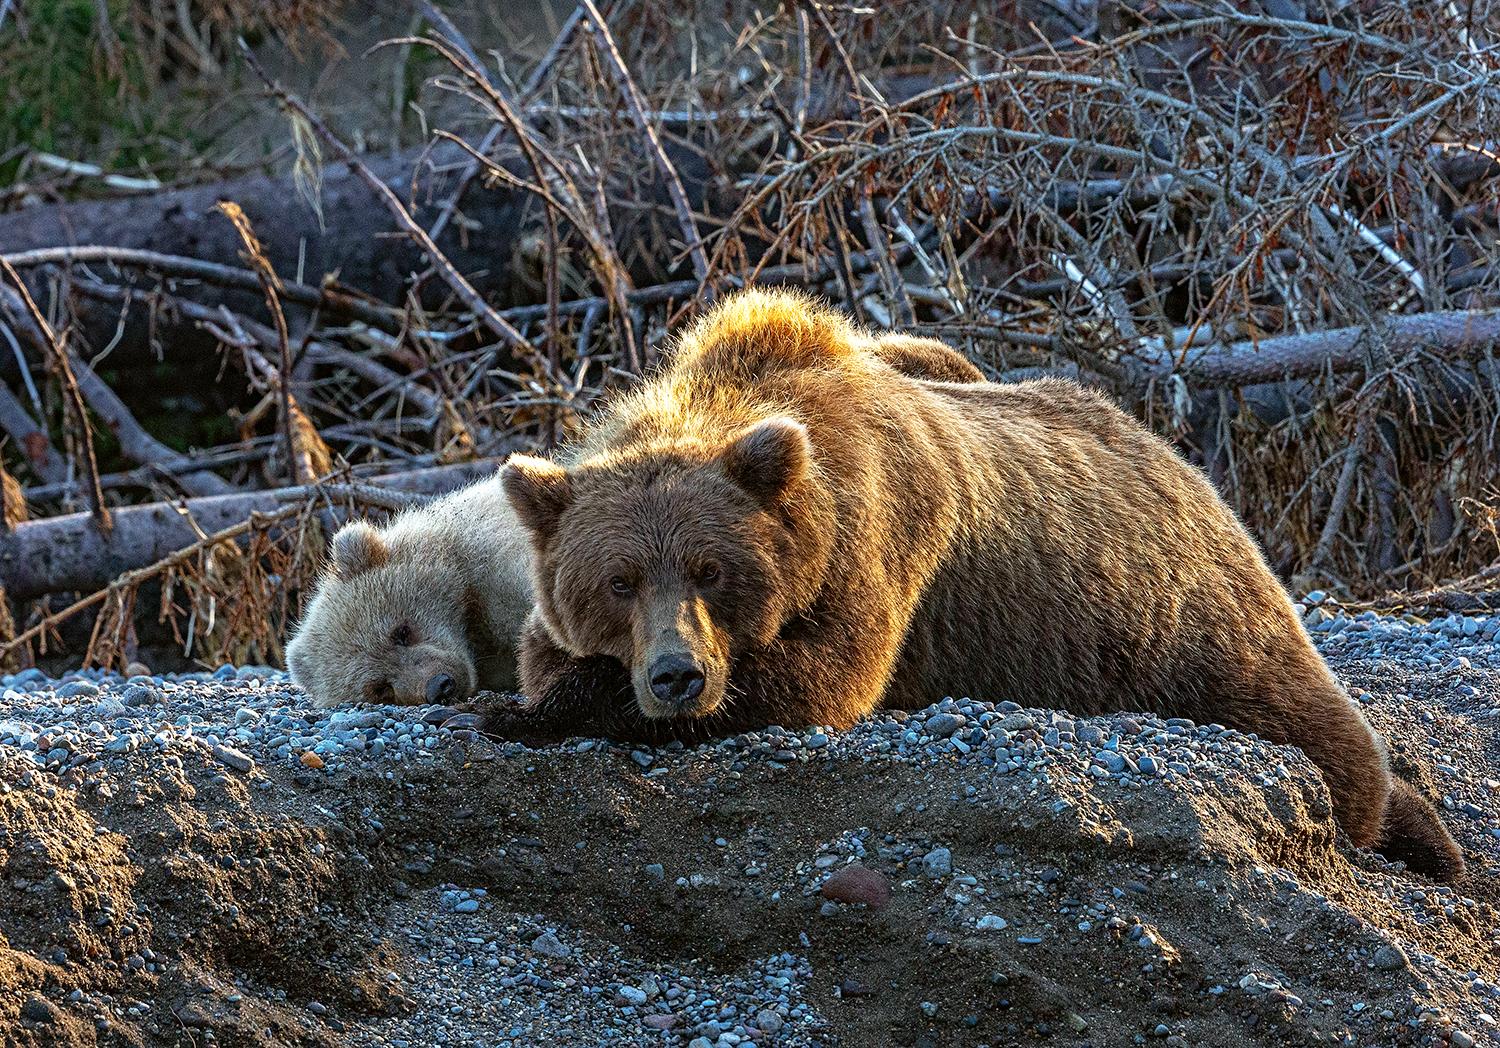
Sleepy but watchful, Lake Clark National Park / Rebecca Latson
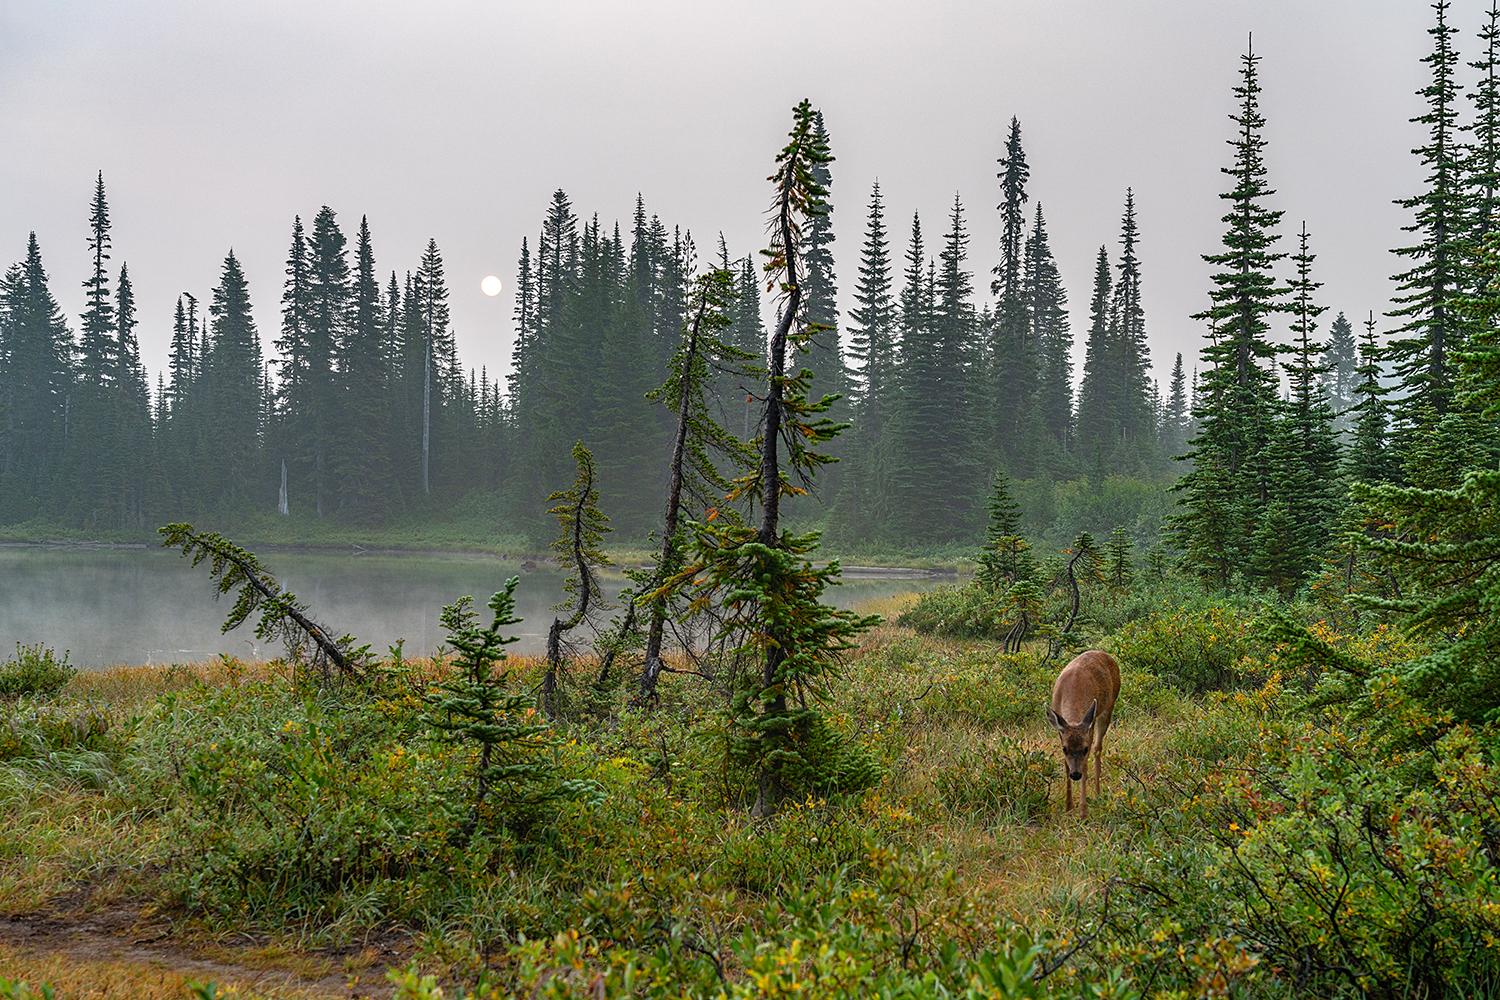
If you can’t get a decent close-up of the wildlife, then include it as part of your landscape shot to show your viewers the environment within which said wildlife lives, roams, and feeds.
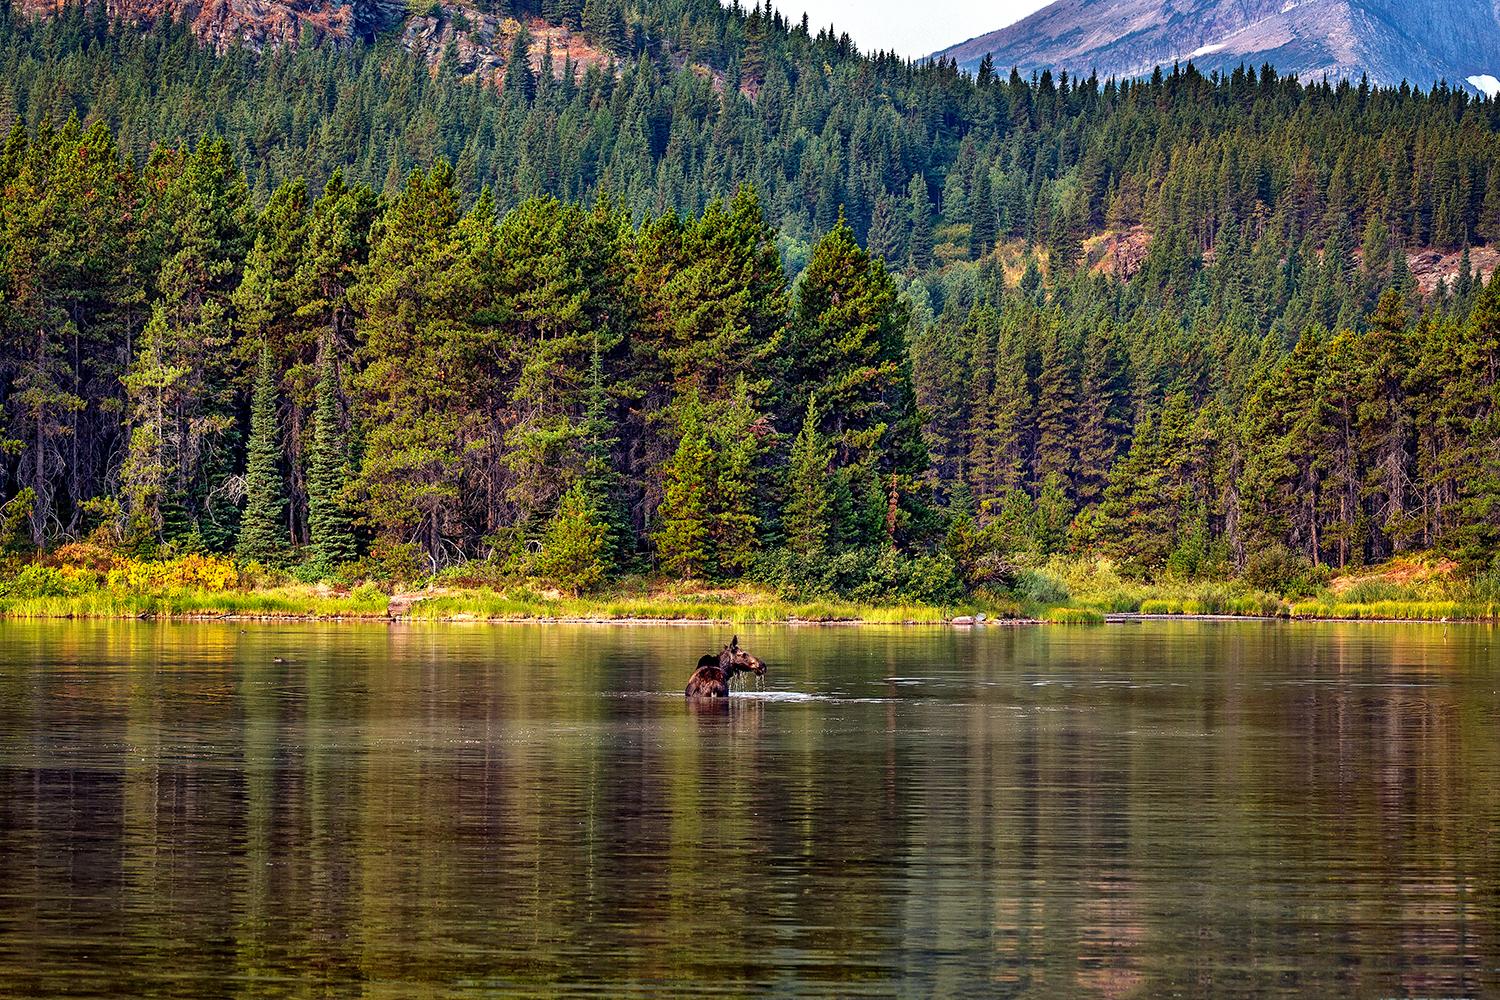
Moose in Fishercap Lake, Glacier National Park / Rebecca Latson
Speaking of telephotos, remember to capture a landscape or two with that “long lens.” Telephotos are good for more than wildlife and sports, you know.
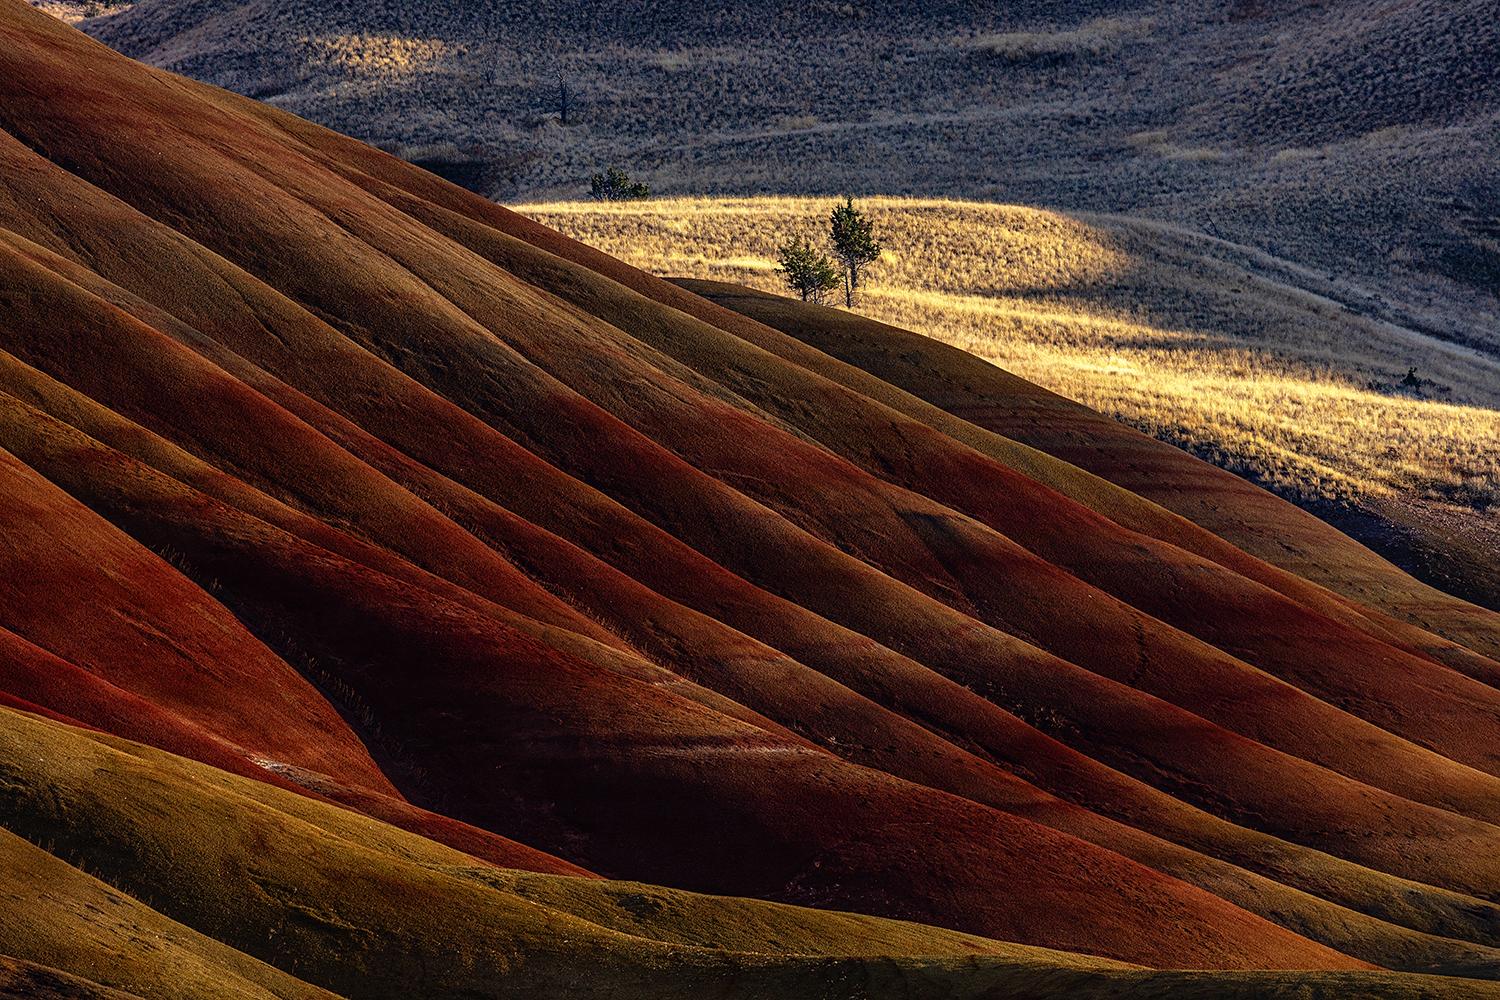
Folds of velvet, Painted Hills Unit, John Day Fossil Beds National Monument / Rebecca Latson
Convert some of those color images to monochrome and see if you notice things (like texture, pattern, shades of shadow and light) that you did not notice with the original color shots.
The view back toward the parking lot at Badwater Basin - original color image, Death Valley National Park / Rebecca Latson
The view back toward the parking lot at Badwater Basin - monochrome version, Death Valley National Park / Rebecca Latson
If you handhold your camera, use the burst method of holding down that shutter button for several clicks. Out of all those shots you’ll get at least one clear, sharp image. Of course, it will take up a lot of memory space so pack plenty of memory cards.
If your camera is affixed to a tripod, then use your camera’s two-second timer or a remote (corded or wireless). You see, when your finger pushes down the shutter button, there’s a tiny bit of vibration from that action which might prevent capturing a truly sharp image. The timer or remote mitigates that issue.
Use a tripod unless you are unable to do so. If you want to get great night photography or timelapses, or silky water shots, or sharp imagery in general, a tripod is required. Hey, tripods even make handy walking sticks to help you over those uneven spots along the trail.
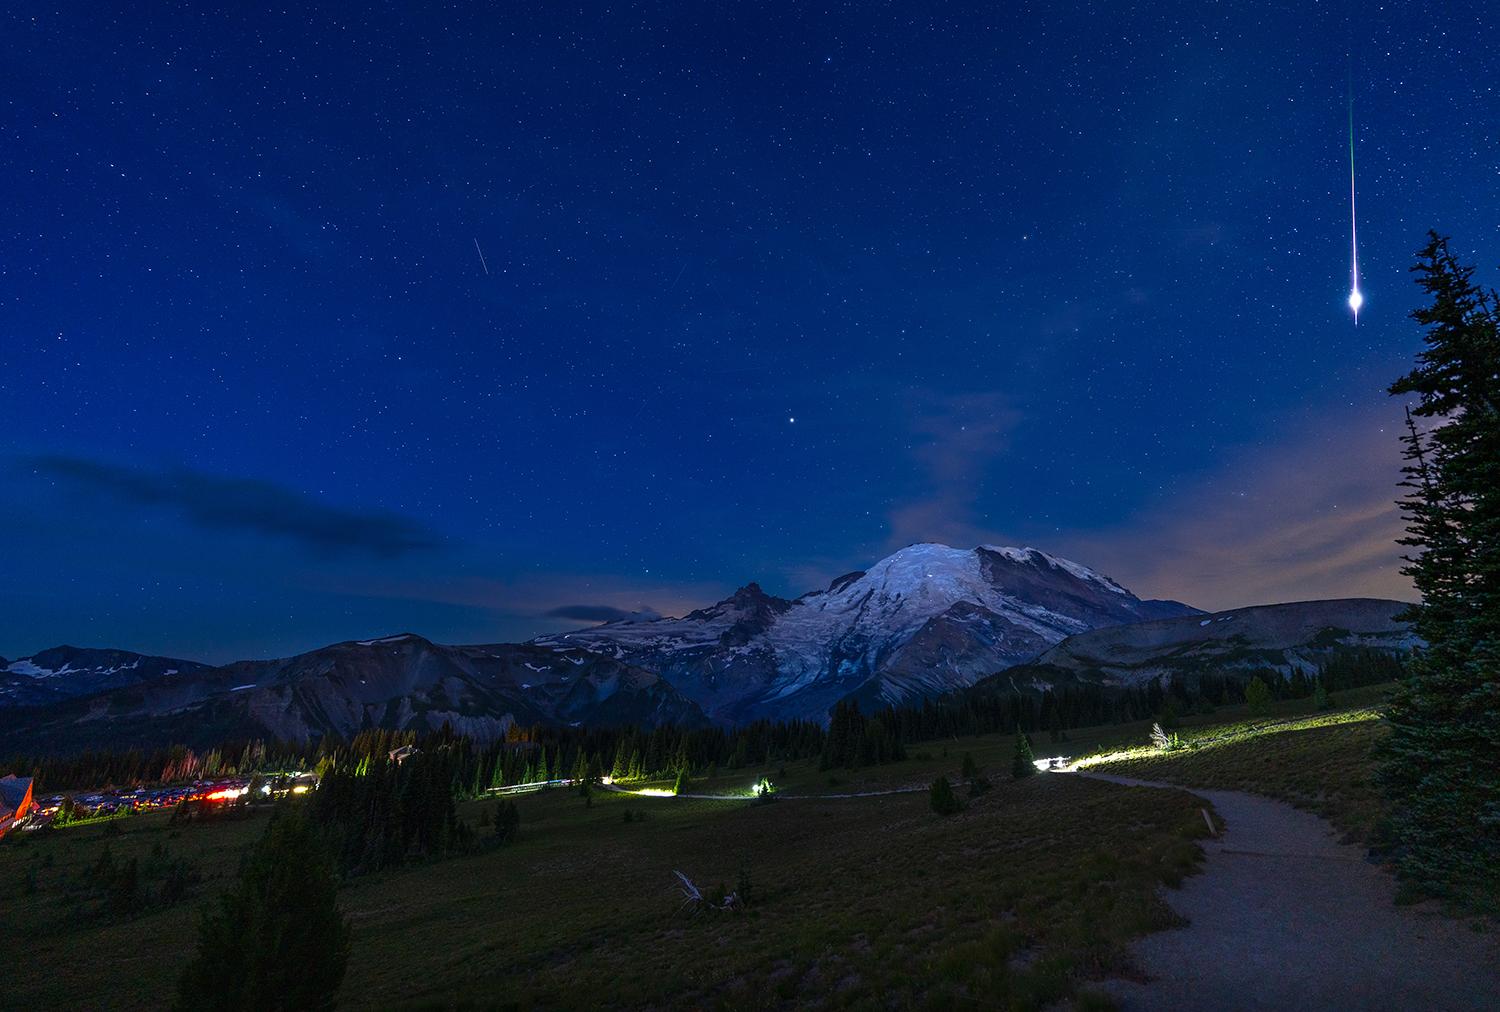
You need to use a tripod for a night shot like the one here at Mount Rainier National Park / Rebecca Latson
Always carry plenty of spare batteries and memory cards, and don’t forget those battery chargers. If you take a laptop with you and there’s an outlet where you lodge, pack a surge protector, too.
Filters are your friends:
- CPL filters act like your polarized sunglasses and remove glare and bright reflections. They also add saturation and texture.
- Grad ND filters prevent your bright horizon from “blowing out” (overexposing) while you expose for the darker portion of your image.
- ND filters allow you to slow your shutter speed enough for a satiny, “silky water” look to waterfalls and other flowing water.
Liberty Pool at Upper Geyser Basin, without and with a polarizer filter, Yellowstone National Park / Rebecca Latson

A "silky water" view of St. Mary Falls using a neutral density filter, Glacier National Park / Rebecca Latson
Use natural frames around your compositions. Trees, window frames, fences, all sorts of things make great natural frames.
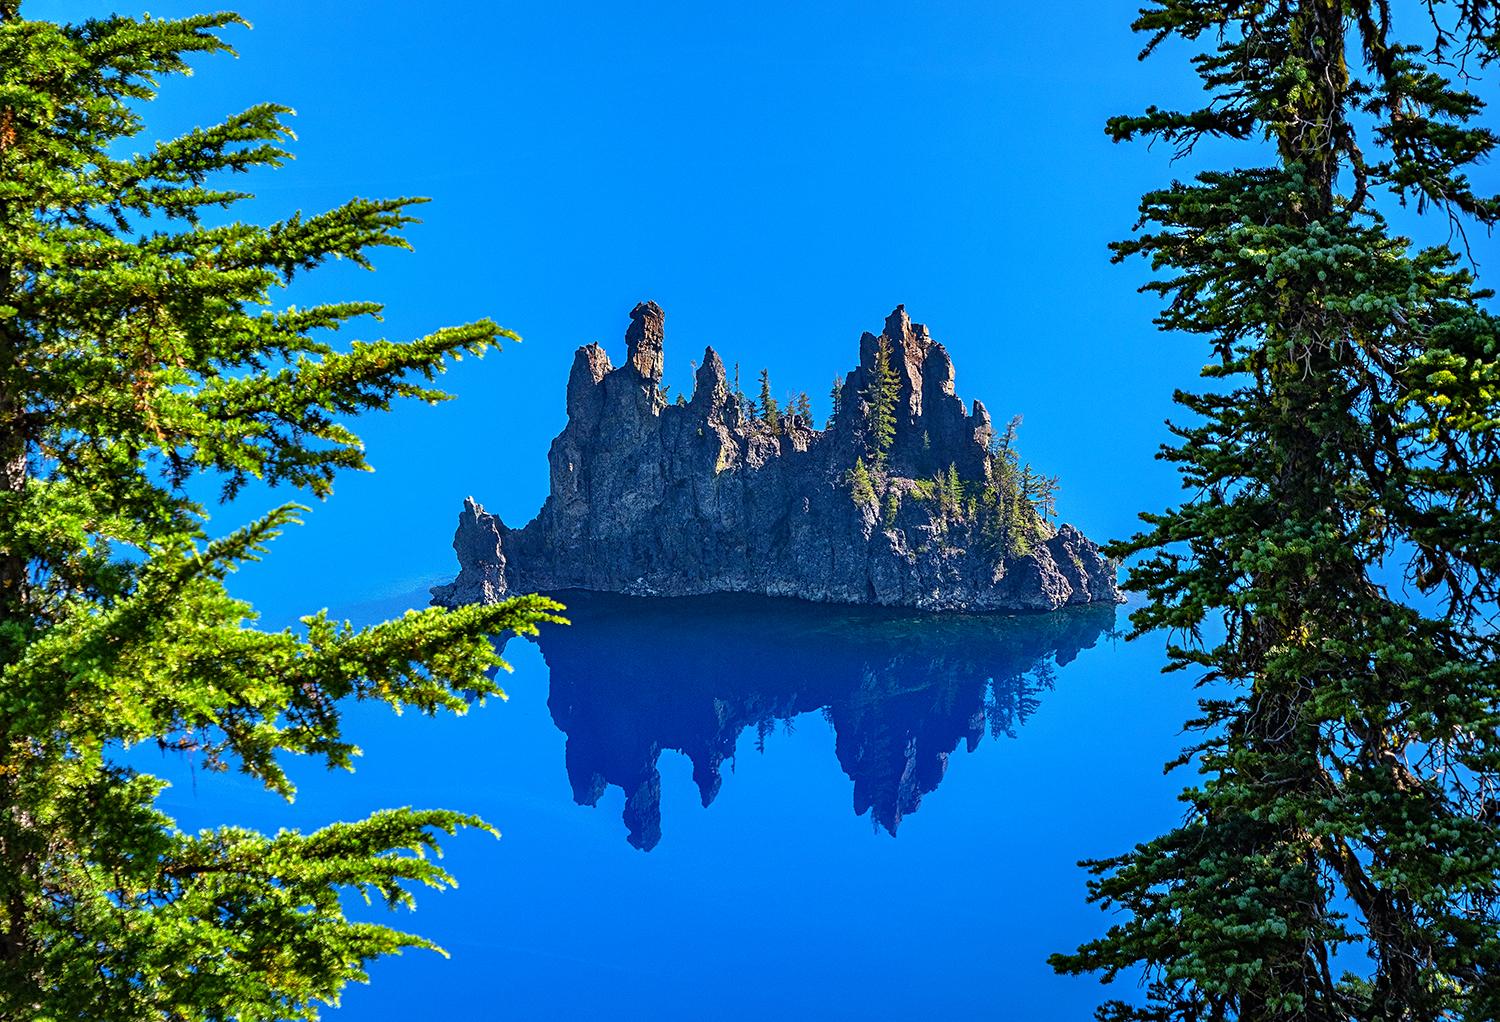
Phantom Ship framed, Crater Lake National Park / Rebecca Latson
If you want to capture snowflakes falling in your winter imagery, slow down that shutter speed. Just be mindful of how slow your shutter speed becomes because the separate falling flakes will become separate falling streaks – which sometimes can look quite compelling. You should use a tripod for this, too.

Bison in a snowstorm at Upper Geyser Basin, Yellowstone National Park / Rebecca Latson
High-ISOs result in sometimes noisy (grainy) images, so use noise reduction software to eliminate most or all that grain. This is especially important when producing night sky or other low-light photos (like lodge or museum interiors).
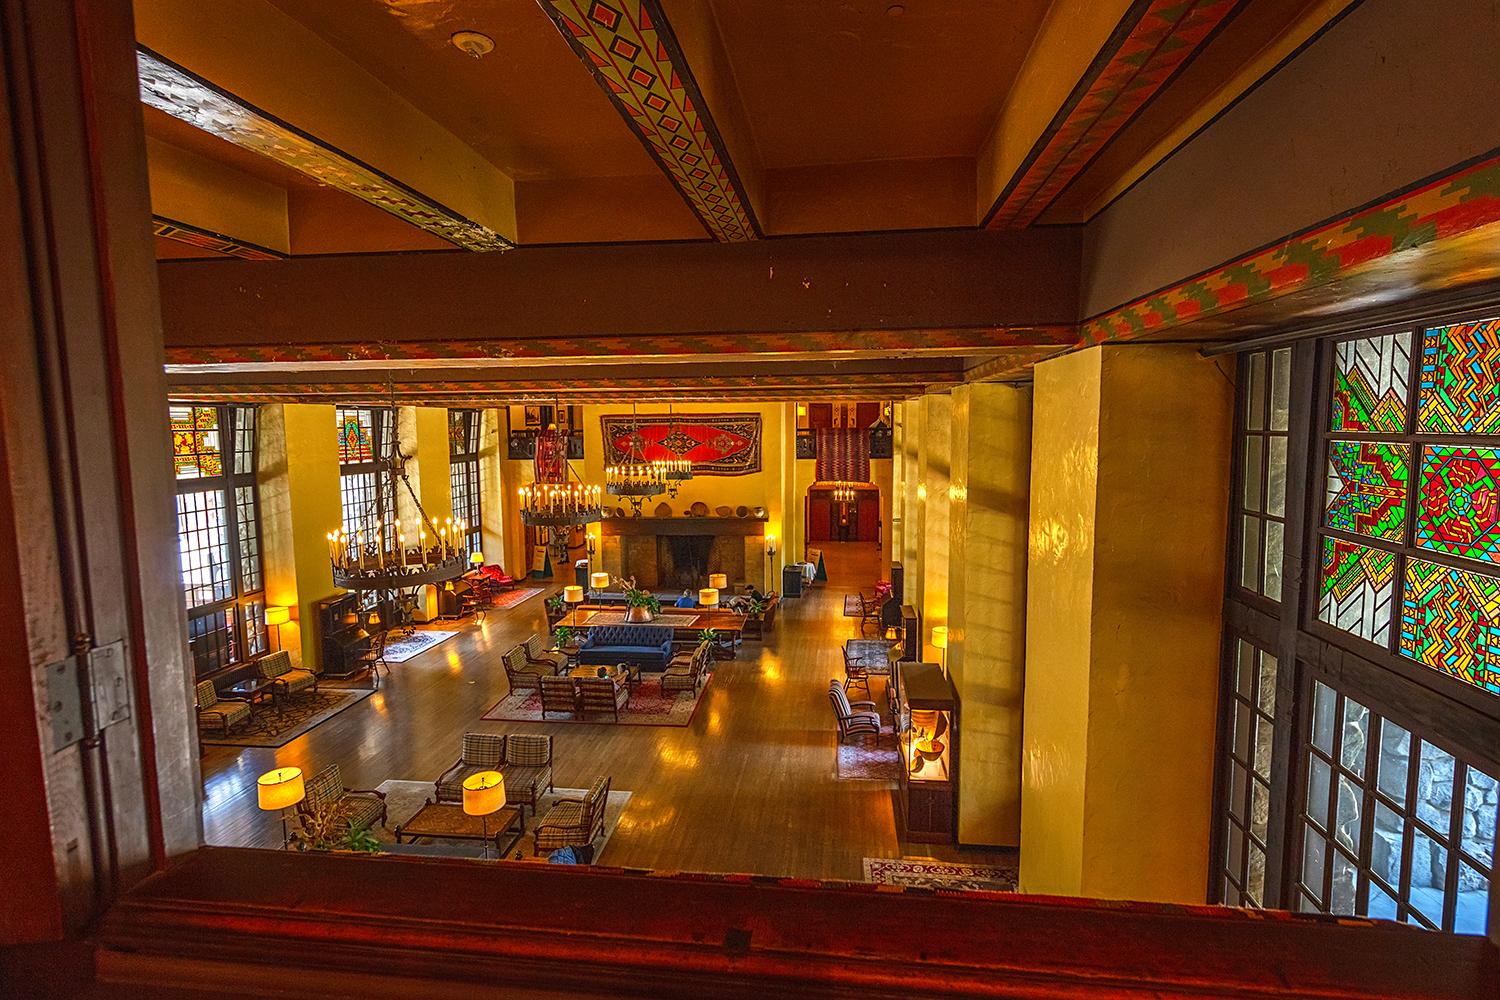
This low-light, interior view at the Ahwahnee Hotel needed a little noise reduction, Yosemite National Park / Rebecca Latson
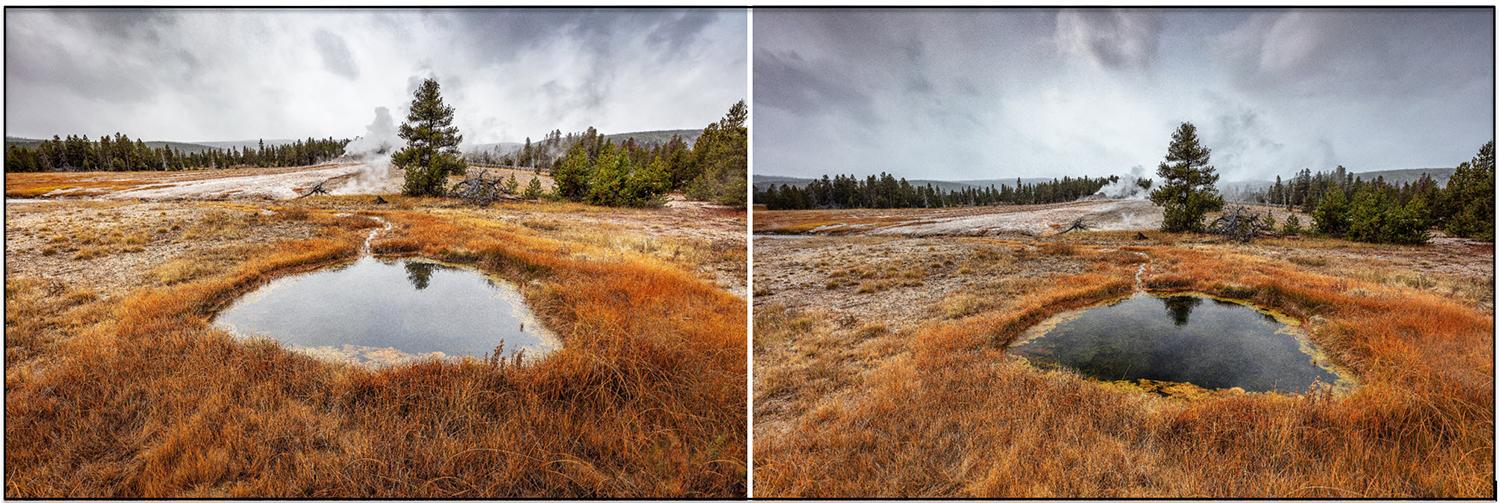
If you illustrate blogs, documentation, other articles with your images, you still want to capture the very best shot you can. If whatever you photograph looks different during a change of seasons, make sure to capture those differences so your viewing/reading audience can see your subjects’ alterations.

Summer and winter views of Red Spouter, Yellowstone National Park / Rebecca Latson
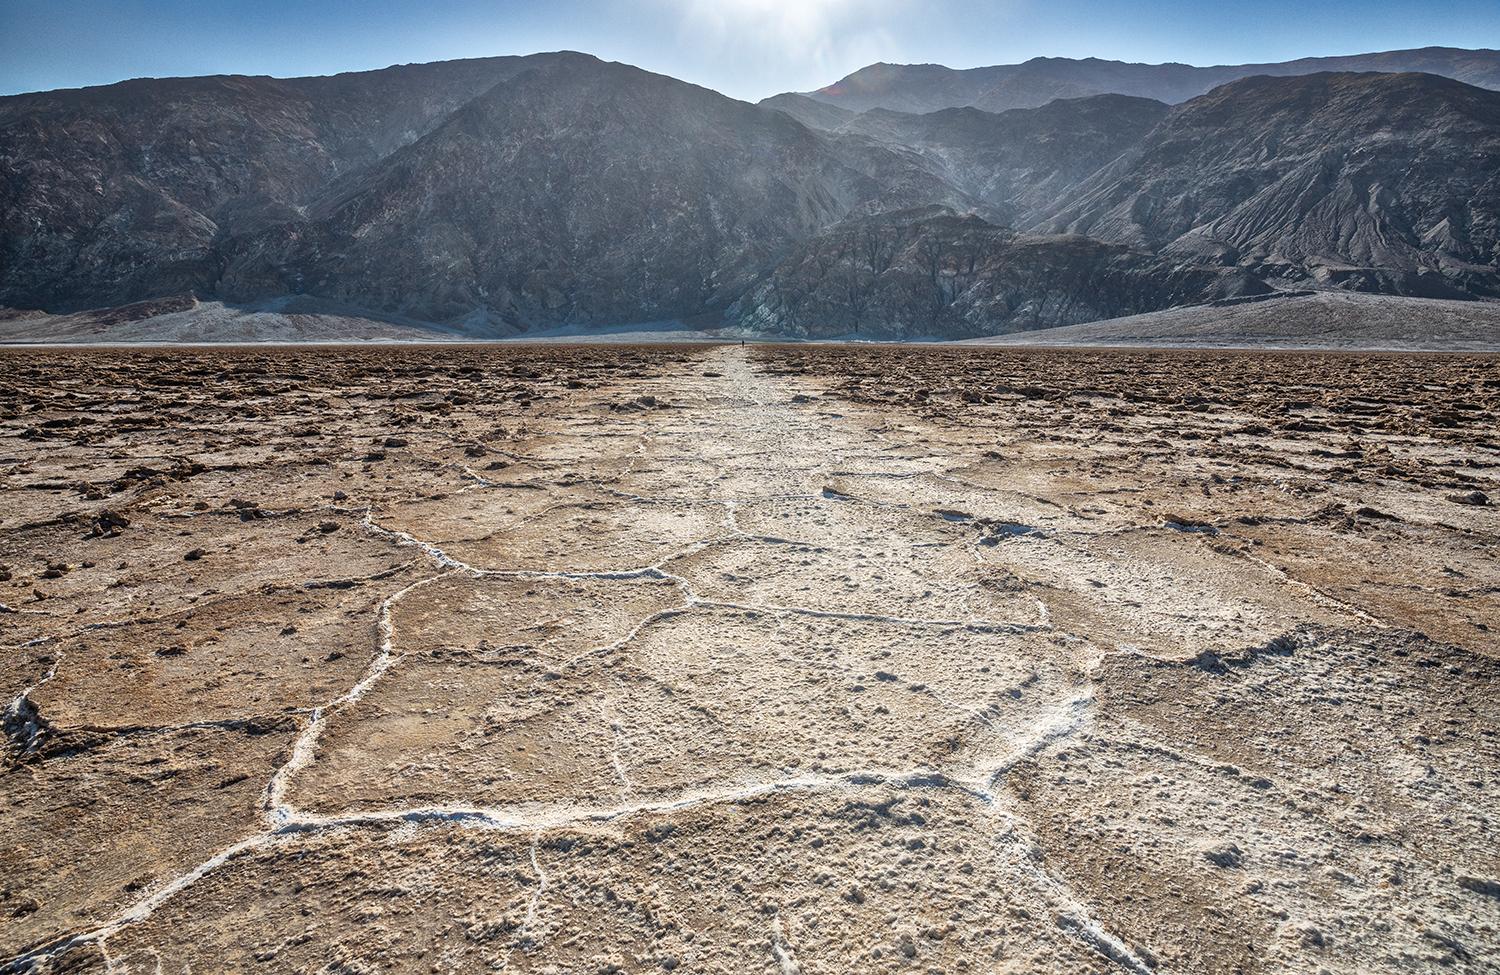
Include people and man-made items in some of your shots, now and then. These recognizable objects provide a sense of scale as well as reference for your viewers.

Midday paddlers on Maligne Lake, Jasper National Park / Rebecca Latson
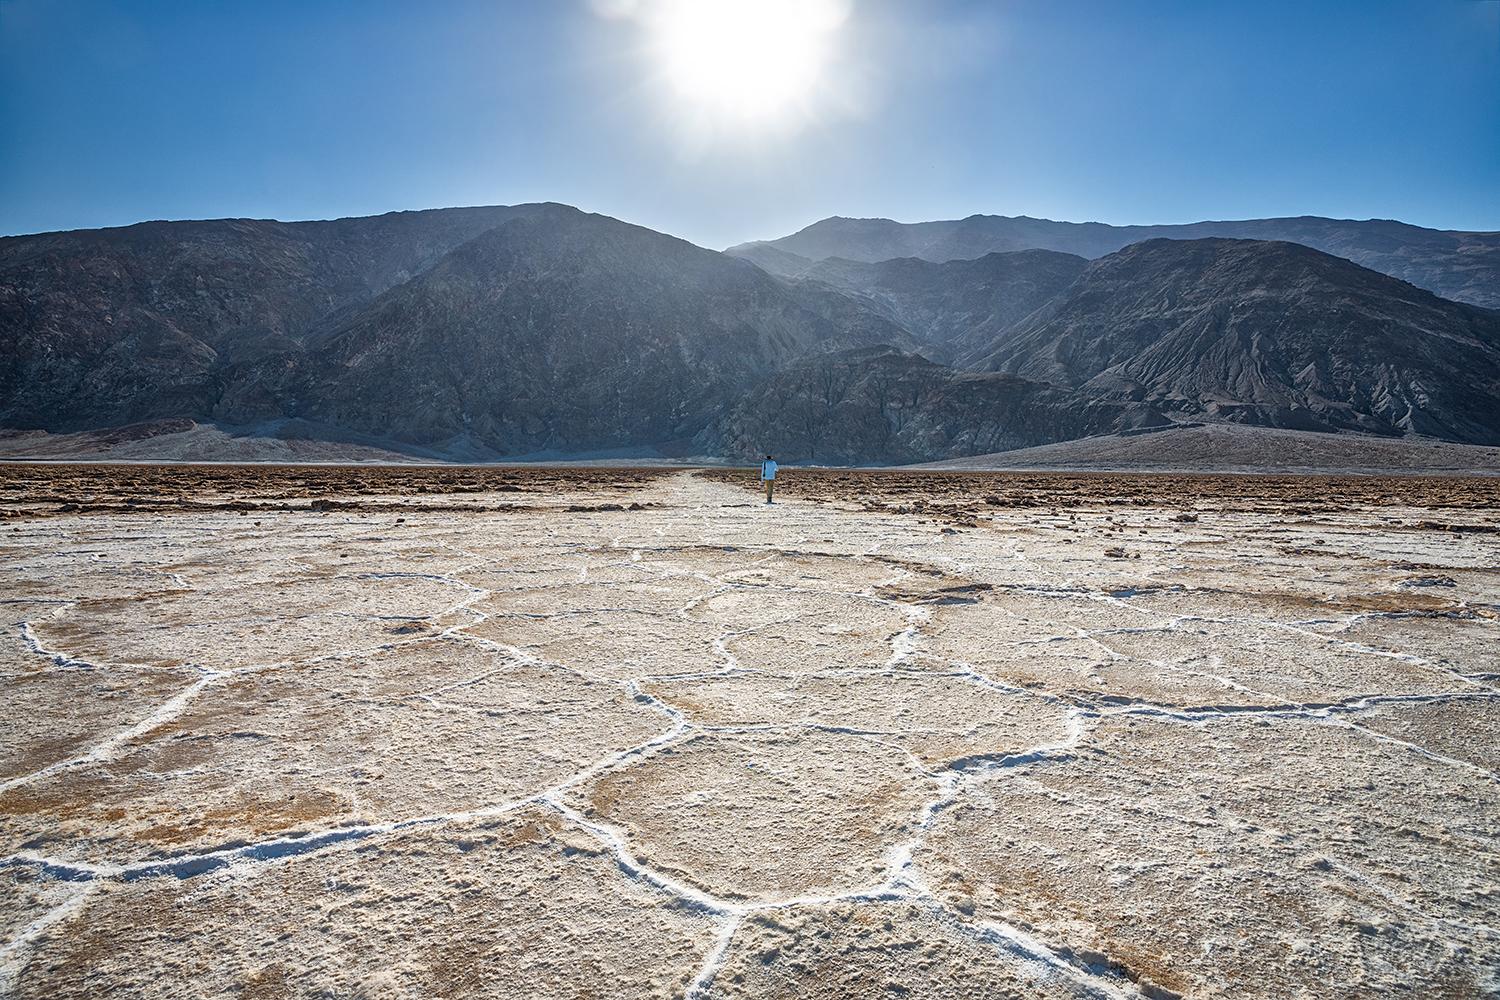
Walking back to the parking lot at Badwater Basin, Death Valley National Park / Rebecca Latson

"For the benefit and enjoyment of the people," Yellowstone National Park / Rebecca Latson
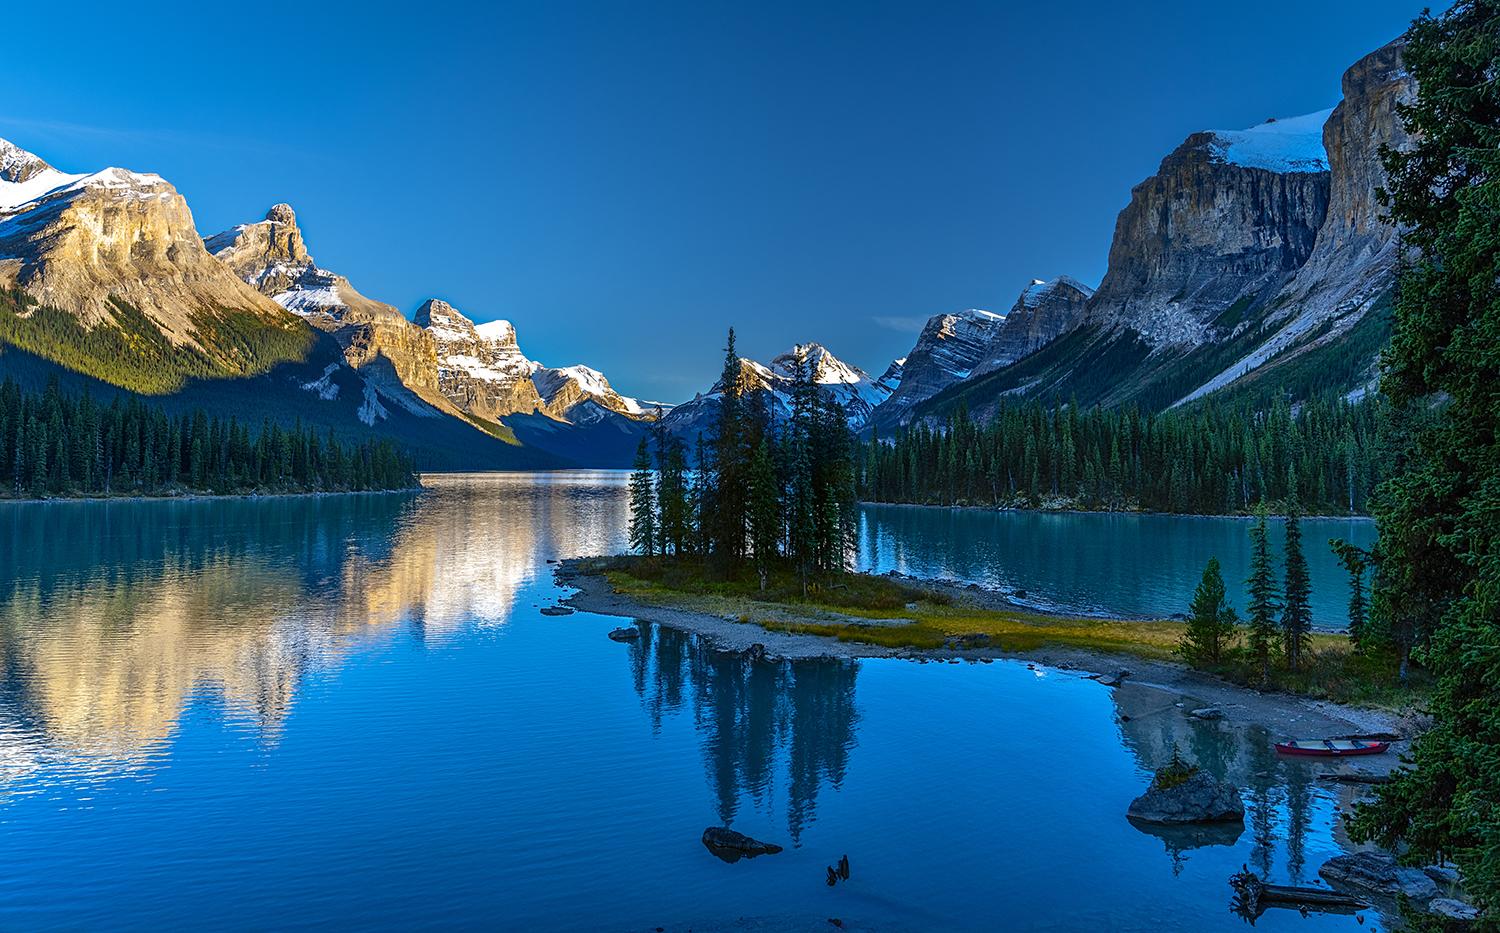
Spirit Island and Maligne Lake landscape, Jasper National Park / Rebecca Latson
Pick a theme for your photography. I’m a fan of the “leading line” theme, where some line within the composition leads the eye from one part of the photo to another. I try to photograph a leading line or two with every national park visit, be it the leading line of a trail, a river, a road, or a stand of trees.
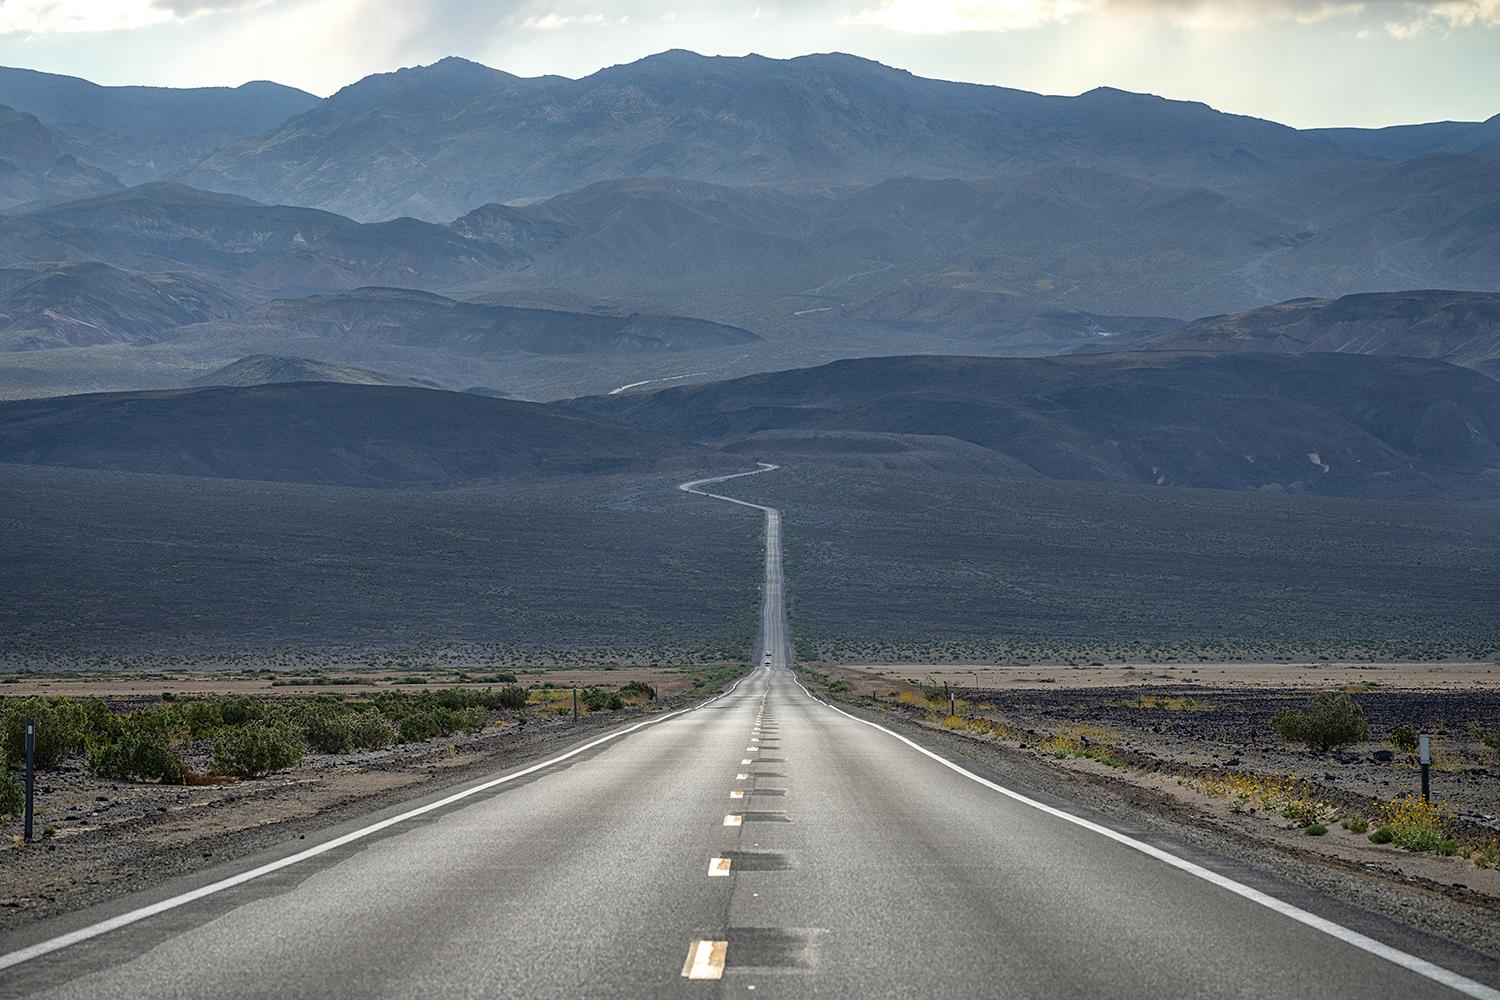
CA-190 heading east from Panamint Springs, Death Valley National Park / Rebecca Latson

The boardwalk over the meadow in Yosemite Valley, Yosemite National Park / Rebecca Latson
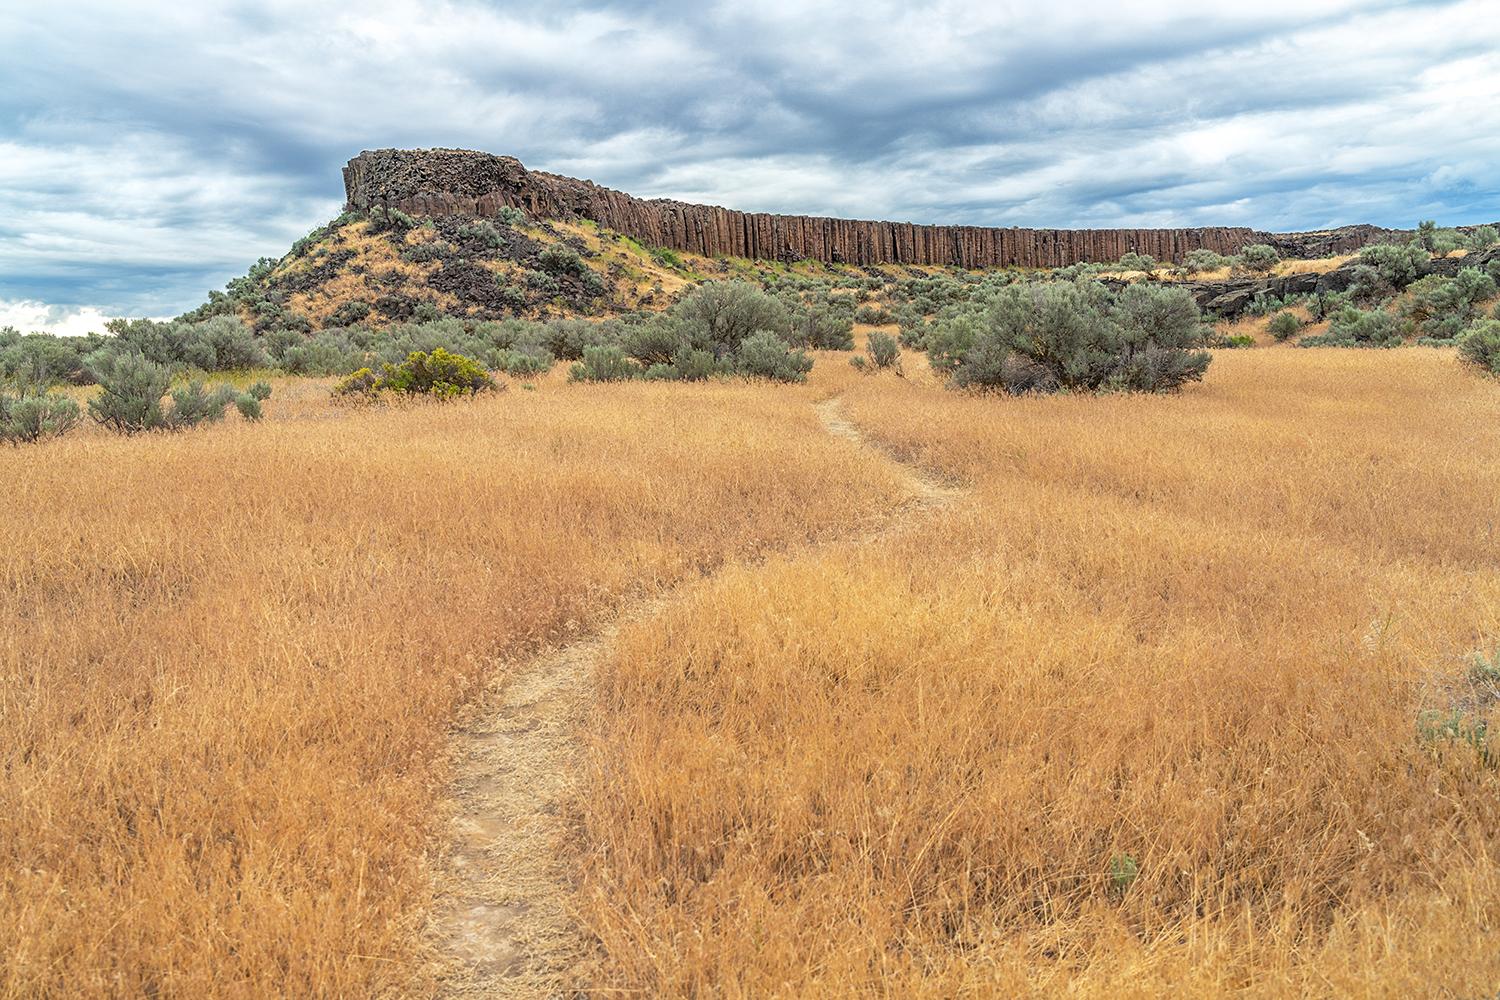
The trail to the basalt columns, Drumheller Channels National Natural Landmark, Ice Age Floods National Geologic Trail / Rebecca Latson
Have you ever seen an old-time photo of a person or group with a sort of dark edging around the photo emphasizing the subjects? That’s vignetting. If you want your audience to really focus on your subject, try adding a judicious amount of vignetting to the image. Most photo editors have a slider or icon for this technique.
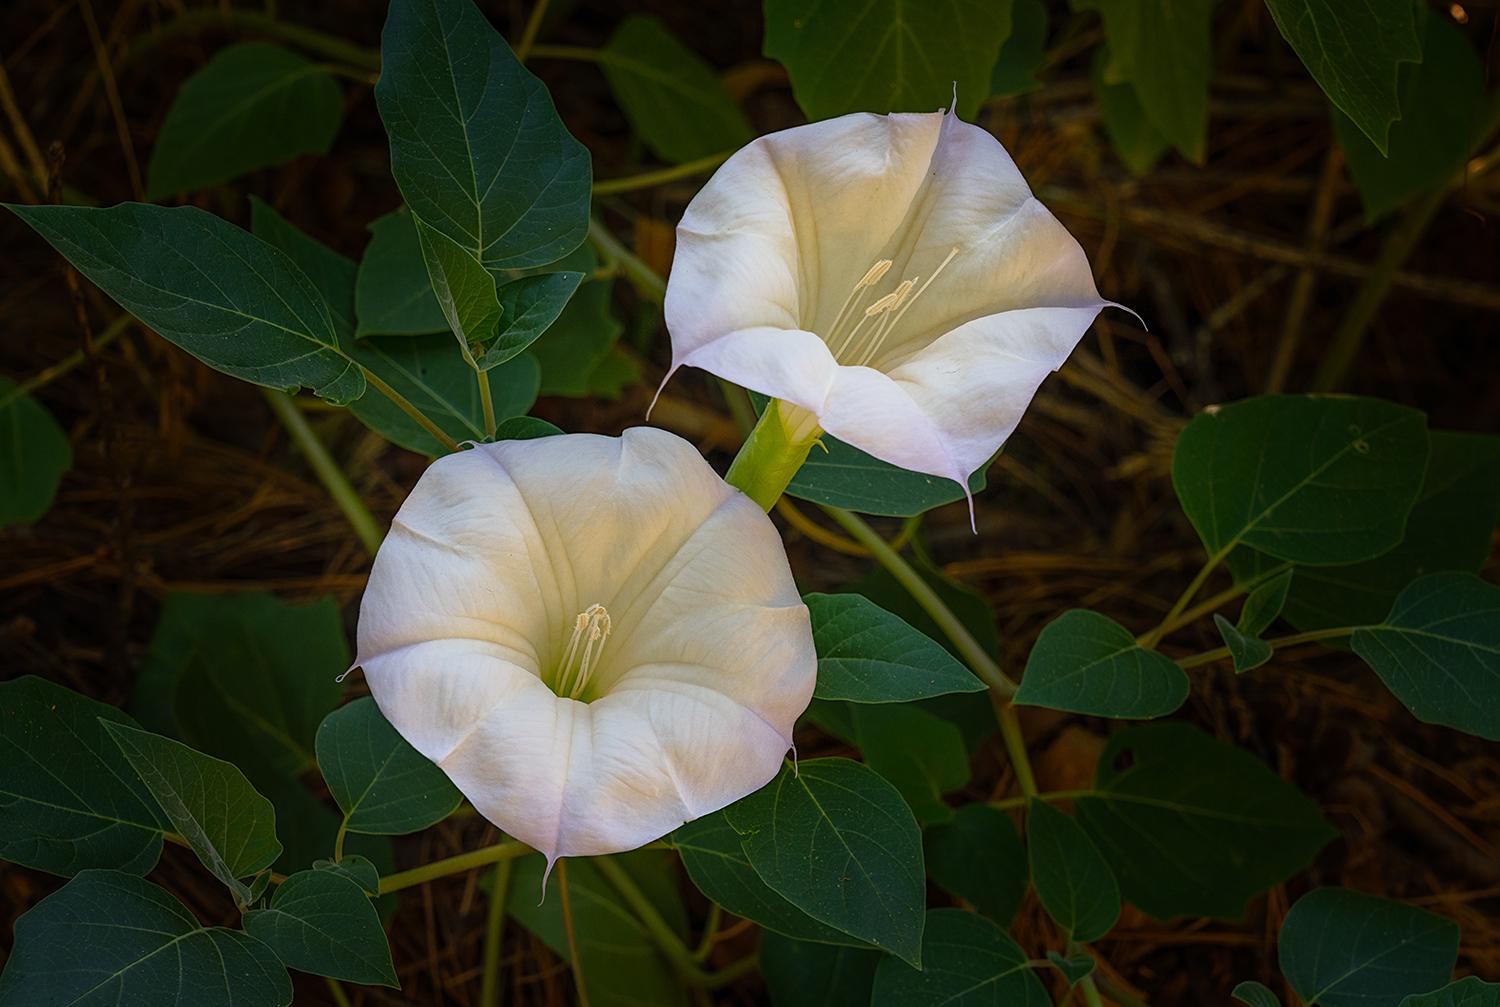
Datura blooms - vignetted, Yosemite National Park / Rebecca Latson
If you have a tripod and some patience, capture multiple “timed interval” images to create a timelapse video. Most cameras have a menu setting for timed interval shots and most photo editing software has a menu item for combining those hundreds of shots into a really cool timelapse.
Play around with your camera settings. Don’t just keep it on Program or Auto mode. Learning about your camera and what it can do makes you a more knowledgeable, and ultimately better, photographer.
Even though that landscape might have already been photographed a gazillion times, go ahead and get that shot. It’s unique because you took that photo with your camera. Where you stood to capture the photo, the time of day, the season, and the weather conditions all combine to make your own composition unique.
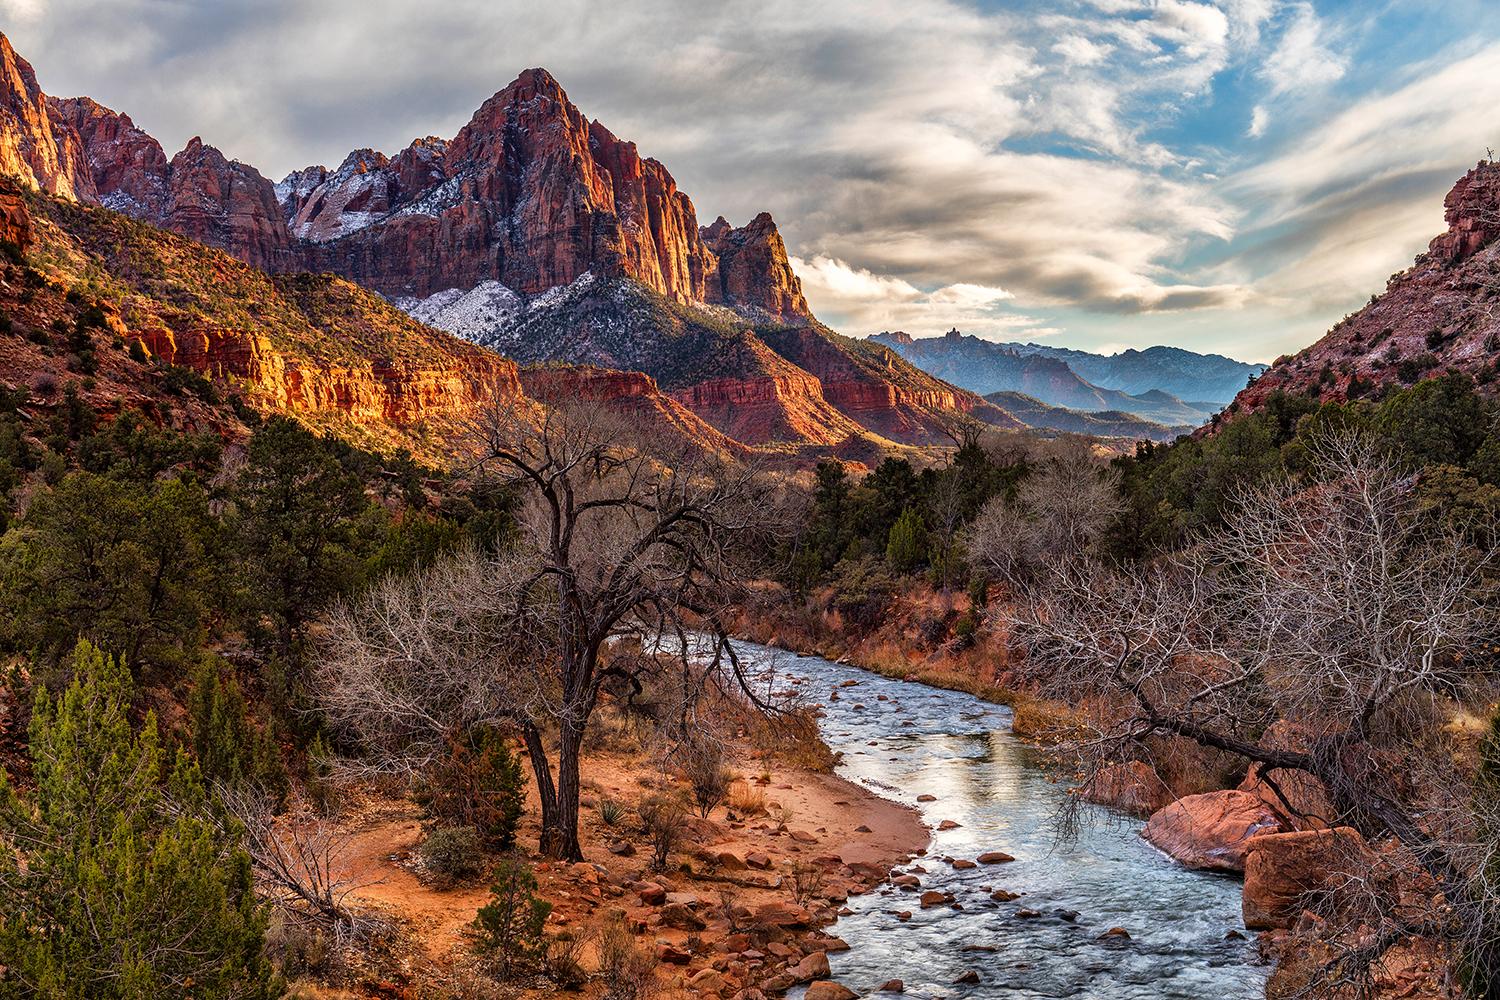
Sunset over the Watchman and Virgin River, a popular spot for a photo, Zion National Park / Rebecca Latson
Keep taking pictures. The more you take, the better you get. Besides, since every photo you capture tells a story, you’ll want to keep taking those photos to really flesh out the story of your national park visit.
Make it a point to take your eye away from the camera and really see the scene around you, from time to time. Stop and listen to the sounds of nature: wind in the trees, the rushing water of a river or creek, birdsong, a hummingbird buzzing you because you are wearing a bright color. Breathe deeply of that pine- or cedar-scented air. Remember those feelings and the scene when you click that shutter button.
There are so many more tips and techniques I am not listing, but I only have so much room to write and I’ve already exceeded my usual 1,200 words. To see most of what I’ve written over the past 11 years, click here.
There are those of you who have faithfully read the Traveler for years, and those of you who just picked up on the Traveler. You all have this in common: you love the outdoors, love the national parks and other protected lands, love learning about these parks, and are concerned for the health and wellbeing of our national parks as well as its stewards. Keep on digging for the truth and keep on fighting to maintain these precious pieces of land "for the benefit and enjoyment of the people."
Enjoy your national parks and keep them in good condition for future Travelers. Stay on the trails and boardwalks, don’t put your hands in hot springs, pack out what you pack in and make every effort to practice the Leave No Trace Principles. Maybe even carry along a bag or two and pick up trash you encounter along the trail. It’s good for your karma and good for the parks.
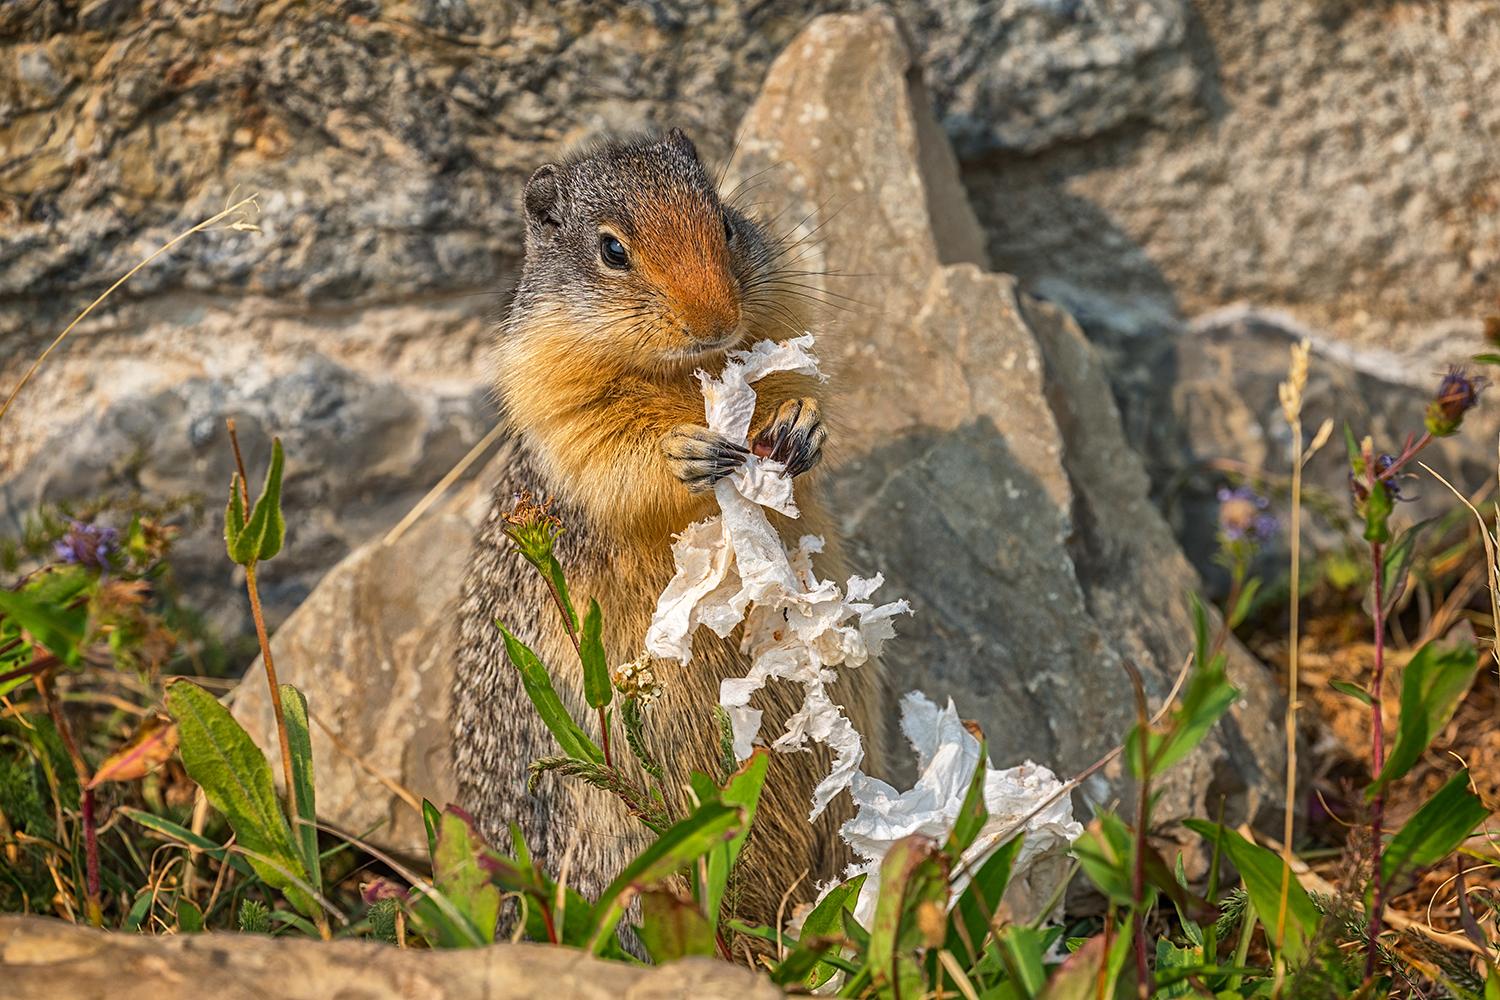
Remember to pack out what you pack in at a national park / Rebecca Latson
You will always be National Parks Travelers, whether or not the Traveler is around. Perhaps you and I will even meet someday on the trail, because I, too, will always be a National Parks Traveler.
Thanks, Kurt, for allowing me the privilege of taking part in this amazing news media site for 11 years. Your 18-year-long labor of love has provided not only fun stuff like quizzes, book reviews, photo columns, trail descriptions, travel itineraries, feature stories, op-eds, and even podcasts, but also deep-dive news your audience has a right to know, from climate change, to invasive species, to mismanagement at all levels affecting the lands our tax dollars help maintain. Thanks for doing this on a daily basis. I dare any other news site to do this and last as long as the Traveler has lasted.

Always a National Parks Traveler / Rebecca Latson

