
Winter "blue hour" at Lake McDonald, Glacier National Park / Rebecca Latson
Winter is coming. Thursday, December 21, is the first day of winter. Depending upon which unit of the National Park System you visit, the season may feel balmy (Dry Tortugas or Everglades national parks) to nippy with maybe a little snow (Big Bend, Arches, Canyonlands national parks), to downright freezing with plenty of snow (Glacier, Yellowstone, North Cascades, Denali, Mount Rainier national parks).
Are you ready for the season? Is your camera ready for the season?
Every year, I write something about photography during winter. It might be a repeat for many of you, but there are others out there, new to the Traveler, who haven’t waded through all my photo columns written over the past 11 years. So, this article is for you, and the rest of you stalwart readers may consider it a refresher piece.
Winter is a great time for photography. The atmosphere is clearer. Yes, even on days when the sky is pewter gray, the atmosphere is still clearer. This is because there are fewer water particles in the air during winter than there are in summer. Why? Because cold air can’t hold as much moisture as warm air can, so there is little to no haze, allowing you to capture a clearer shot of the landscape.
Winter means snow in many, but not all, national parks. This article is geared toward photography in parks experiencing cold or cold-and-snowy weather, because there are certain precautions you need to take to winter-proof your camera (this includes smartphone cameras).
While visiting one of those red-rock national parks in the Southwest, like Arches National Park or Zion National Park, both in Utah, you might get lucky enough to experience a snowfall. Nothing like white snow on red rock.
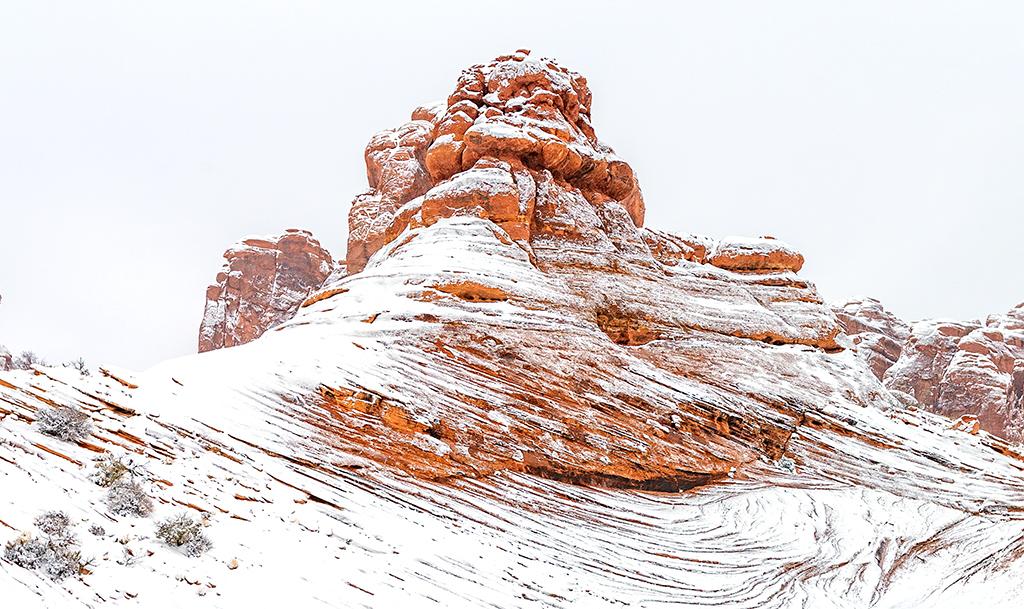
White snow on red rock, Arches National Park / Rebecca Latson
Visiting a national park in the northeast like Acadia national park, or further west or northwest, will guarantee more than just freezing temperatures. Heaps of white stuff will blanket the landscape, creating a quiet winter wonderland filled with photo ops.
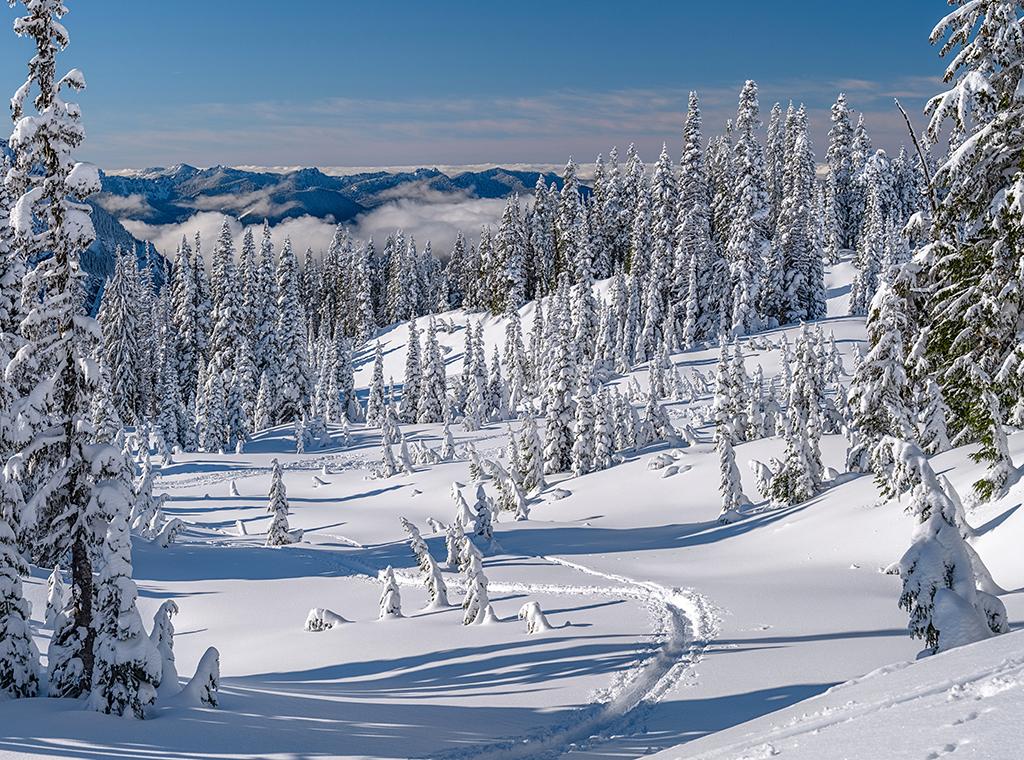
A winter wonderland at Mount Rainier National Park / Rebecca Latson
Whether you feel a snowflake or not, these parks will still be pretty chilly in the mornings, evenings, and nights. So, in addition to packing warm clothing for yourself, don’t forget to prep your camera. Nowadays, most cameras are “weather resistant,” but they may not really be weatherproof. It’s one thing to get a few snowflakes on that lens, but another to photograph in a substantial snowfall of fluffy flakes under blizzard-like conditions. Camera rain covers are just the ticket and online sites like BH Photo or Adorama carry a wide selection of brands. Just type “camera rain cover” in that site’s search field to see what you pull up. Good for both rain or snow, these covers add a layer of winter weather protection.
Camera batteries have improved over the years regarding cold weather stamina, but they still won’t last as long as you’d like. This includes your smartphone’s battery. Keep that phone out too long, and suddenly it will go dark (trust me on this). You’ll have to plug it into your vehicle via a charger to warm that baby up and get that battery going again. Best thing to do is take your smartphone out for a few shots or a short video, then immediately re-pocket it. As for SLRs and point-and-shoots, carrying extra charged batteries in your pocket or pack assures continuation of your camera’s power when the battery already inserted loses juice.
Once you are finished with your photo compositions at a particular spot, put the camera back in your pack or a Ziploc-type bag. This allows the camera’s gradual acclimatization to any temperature changes (like the change from below-freezing temperatures outside to a nice, warm, vehicle inside) without building up any condensation within the camera or lens. Again, weather-resistant cameras have come a long way and really, you might not have this condensation issue at all. In all my decades of photography, I only once experienced condensation on the lens (thankfully, not in the lens). Nonetheless, it’s good to play things safe and do everything you can to keep your camera prepared for that next photo op up the road or trail.
Now, let’s talk about those photo op results. Occasionally, you may notice a gray cast to your snow photo. In some cases, this works well with the rest of your composition, particularly on a gray winter day when the sky is colored a pewter shade. In other cases, it just won’t look right. Why does the camera create a non-bright-white snow image when you see the bright white with your own eyes?

Original and corrected for color cast, Yellowstone National Park / Rebecca Latson
For one thing, your eyes are still much better at differentiating color, brightness, and shadow than a camera. But, if you use the “auto white balance” setting on your camera (which I often do), you allow the camera to utilize its built-in gray-scale algorithm, which is an all-purpose algorithm set up for what it (or the technicians that designed the camera) consider an “average” brightness, which tends to underexpose snow and other non-snow highlights. How do you correct that issue so your white snow looks like white snow? You don’t want to overexpose the entire image just to get that white snow, but you can use your camera’s exposure compensation dial or menu setting. Simply put, exposure compensation allows you to override your camera’s decisions on what should or should not be bright or dark. Move that dial up by +1 or +2 and see how your resulting image looks.

Original and corrected for color cast, Yellowstone National Park / Rebecca Latson
You might also notice a blue cast to your snow. Part of this may be the way your camera’s color temperature is set up (yes, color has temperature and it’s measured in degrees Kelvin), and part of it is just the play of light (snow looks blue in the shade). Part of it may also be if you still have your circular polarizing filter affixed to the lens (ahem). Like the gray cast to your snow shot, sometimes that blue cast works to nice effect … sometimes. Just like using in-camera settings to counteract a gray cast, you can use camera settings to reduce / remove that blue cast. Smartphones actually do a nice job of capturing a scene’s color without any sort of color cast, so they are not as much of a worry when capturing a correctly-colored composition. SLR cameras and point-and-shoot cameras have white balance modes which mitigate color cast issues. If you choose the “shade” or “cloudy” mode, the camera will adjust its color balance by adding a little yellow to the scene. Most SLR cameras also have a menu item allowing you to change the original factory temperature setting. The higher the color temperature (ex. from 5,600K on up to 7,000K or 9,000K), the more the color balance is shifted from blue to yellow. You can also change the color balance when editing your images as your photo editor will have a slider or icon you can move toward the yellow range.
So, you’ve taken care of any color cast issues and you and your camera are prepared for winter weather. Here are a few tips for interesting compositions of that winter scene.
Naturally, if you have bright colors contrasting with the white snow, you’ll want to capture that striking color difference.

Snowy steps up to the North Window, Arches National Park / Rebecca Latson
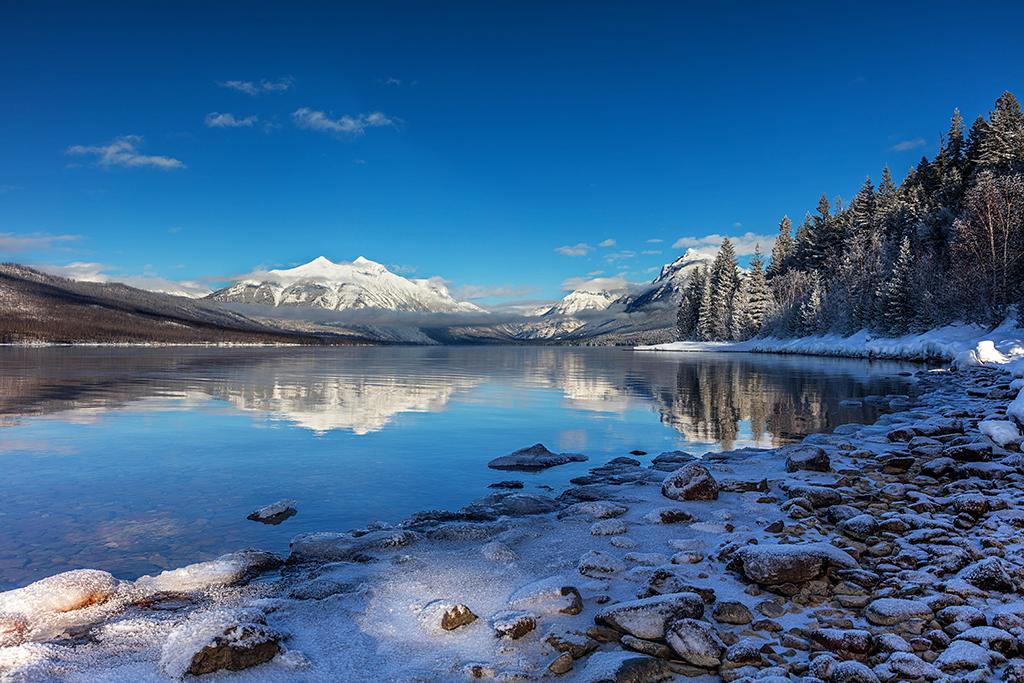
A bluebird winter day at Lake McDonald, Glacier National Park / Rebecca Latson
Sometimes, though, the scene will look monochromatic and you might not even see what you expected to see, like the image below captured at the south end of Glacier National Park's Lake McDonald looking out toward the mountains. Um, just where are those mountains, anyway? Go ahead and get the shot (those clouds are pretty dramatic, aren't they) and maybe even add a human (or human-made) element in the composition for good measure to indicate scale and reference.
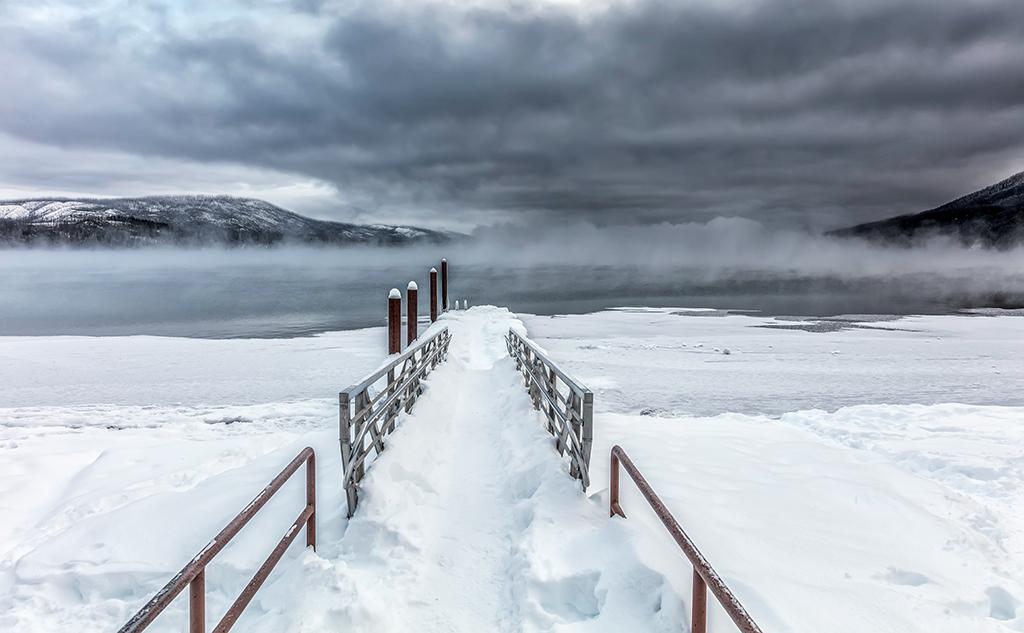
A typical winter morning at Lake McDonald, when the clouds cover the mountains beyond, Glacier National Park / Rebecca Latson
Why not duplicate the resulting image and convert it to black-and-white. Monochrome photos are great for displaying textures, patterns, light and shadow, that might otherwise get lost within all the color.

Original color image of a sunny winter day at Lake McDonald, Glacier National Park / Rebecca Latson

Original image above converted to black-and-white, Glacier National Park / Rebecca Latson
Create a natural frame around your photo. Trees, window frames, fences – they make great natural frames. The darker the natural frame, the more striking the image looks because that dark frame makes the viewer focus more on the white snow scene.

Natural frames (and a leading line), Mount Rainier National Park / Rebecca Latson
Addition of a little vignetting also focuses the eye more on your winter (not necessarily snowy) subject. Think of those old-timey photos of people with that dark oval around the edges of the picture. That’s vignetting and when judiciously applied can work to great effect.

A little waterfall by the Virgin River - vignetted, Zion National Park / Rebecca Latson
Capture the leading line of a trail or footprints through the snow.
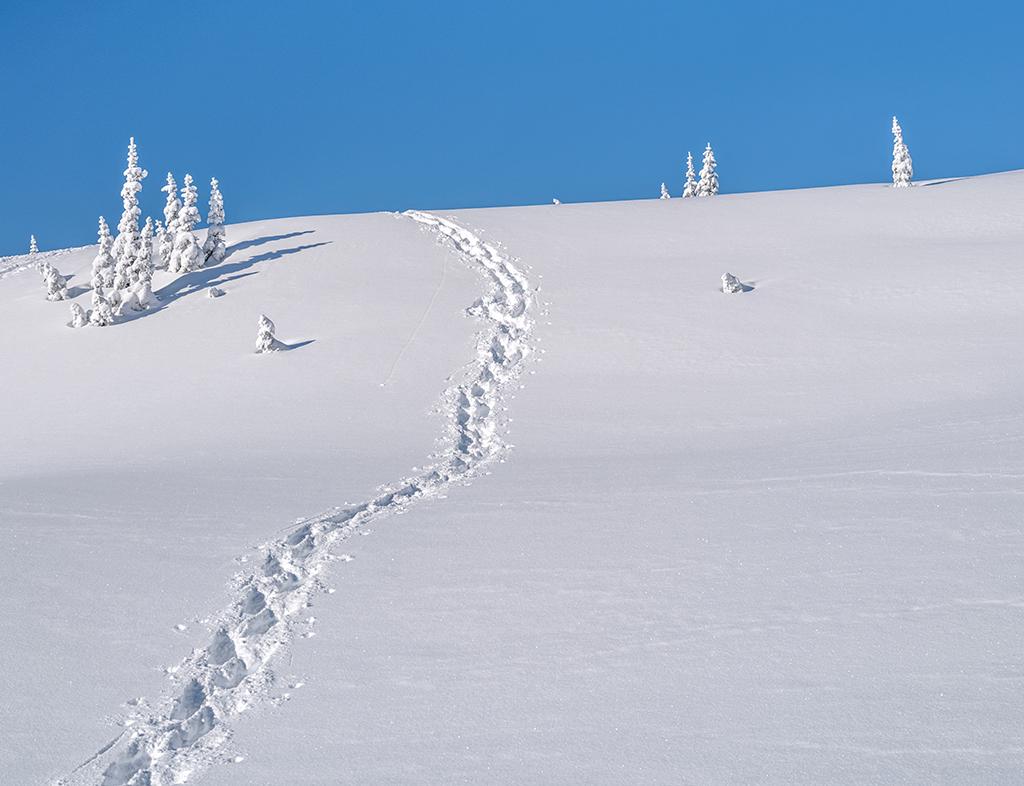
Blue sky and white snow, Mount Rainier National Park / Rebecca Latson

A snow trail to "The Mountain," Mount Rainier National Park / Rebecca Latson
Duplicate your finished image then create a “high key” version. High key means you’ve overexposed your shot – on purpose. That’s right, just move that exposure slider a little (or a lot) more to the lighter side. Your composition will have very few, if any, shadows, and much brighter highlights creating a starker appearance. Anything dark will really stand out, such as exposed rocks on a snowcapped mountain, a line of trees over snow, or wildlife against a snowy backdrop.
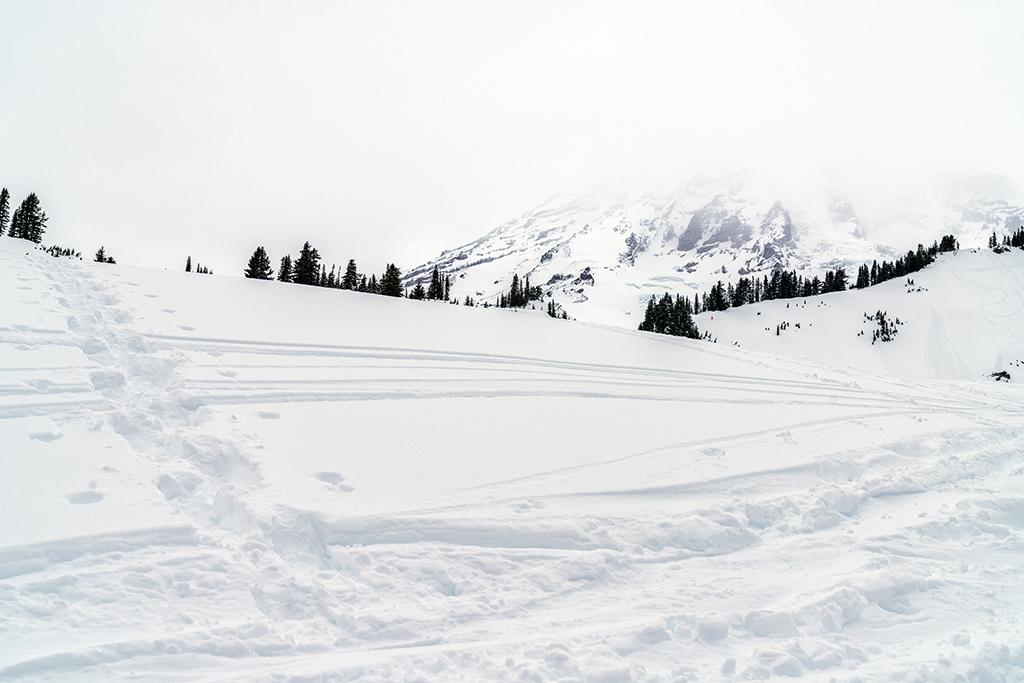
Breaking trail upward to a better view, Mount Rainier National Park / Rebecca Latson

A "high key" version of the original, Mount Rainier National Park / Rebecca Latson
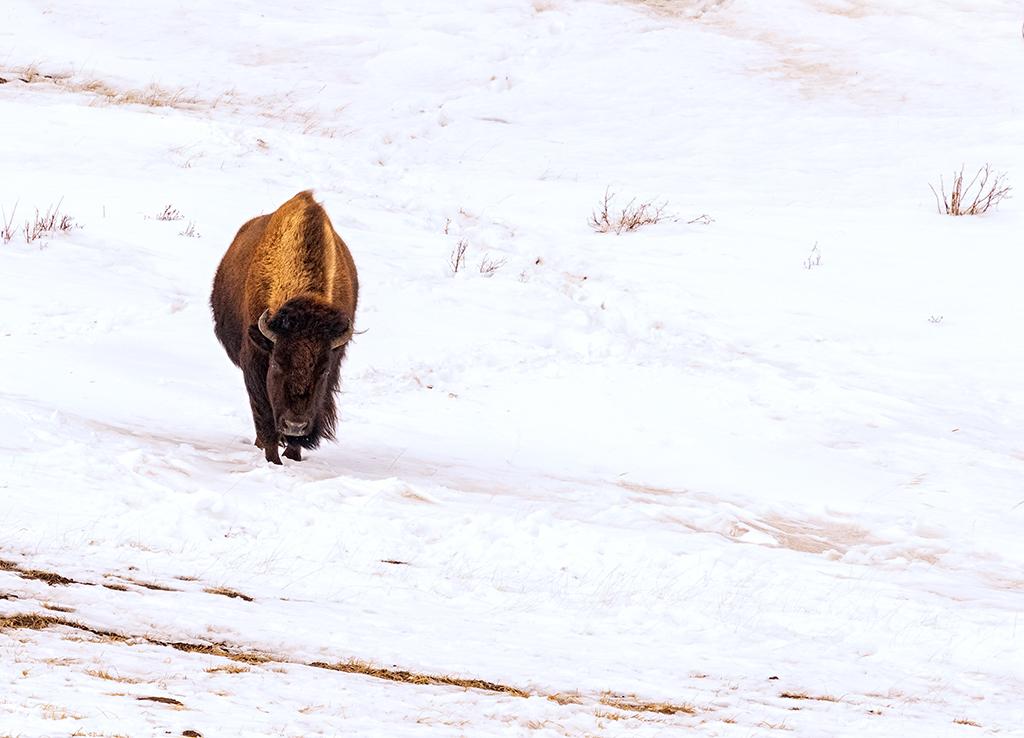
Lone bison in the snow - original, Yellowstone National Park / Rebecca Latson

Lone bison in the snow - high key, Yellowstone National Park / Rebecca Latson
You may wish to capture snowflakes falling within your composition. The slower your shutter speed, the more pronounced those falling flakes become. Too slow, though, and those separate flakes will look like streaks. In some cases, “streaky” snow looks quite compelling, especially if there is wildlife in your image. Just make sure to use a tripod for your snow shots if you are going to slow the shutter. Handholding the camera with a slow shutter speed will result in blurred snow, rather than flaky or streaky snow.

Snow lightly falling at Lower Emerald Pool, Zion National Park / Rebecca Latson
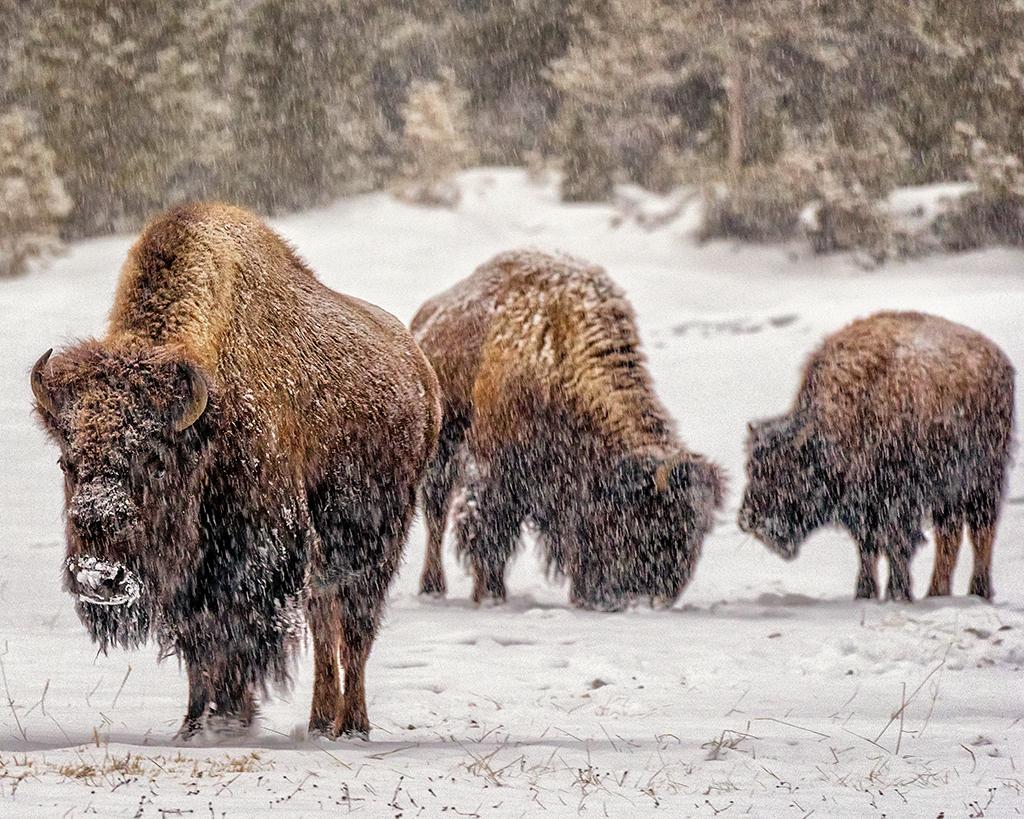
Bison in a snowstorm at Upper Geyser Basin, Yellowstone National Park / Rebecca Latson
Winter is an awesome season for national park photography. Use these tips and techniques and experiment with your own ideas, too. Not only will you learn more about what your camera can do for you, but your viewing audience will be impressed and you’ll be rightly proud of your photo skills.

Winter mood up at Paradise, Mount Rainier National Park / Rebecca Latson


Comments
Love how you've captured various scenes of falling snow here. As always, nice work.