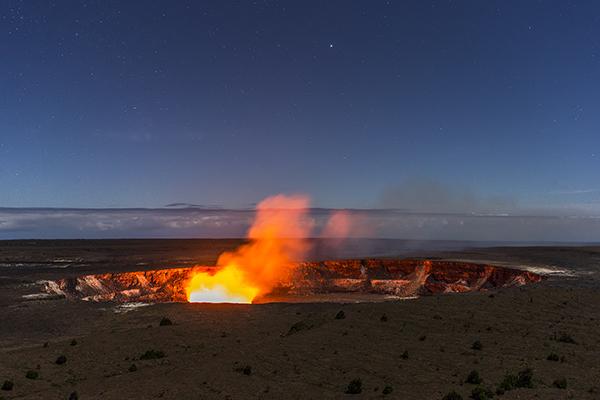
Just me, my camera, the stars and Kilauea's glow at 3:30 a.m., Hawai'i Volcanoes National Park / Rebecca Latson.
Hau'oli Makahiki Hou, Everybody! That's 'Happy New Year' in Hawaiian.
It's always been my on my bucket list to travel to Hawaii to visit and photograph an active volcano. So, my last photographic trip for 2014 was to the Big Island in October, when I spent 4-1/2 days within Hawai'i Volcanoes National Park. This park, with beaches, rainforests, craters, and an active volcano, areas all populated by flora and fauna native to the state, truly is a paradise for a photographer.
Photographing Cooled Lava
I knew I would capture images of the landscape as well as the plant and, hopefully, birdlife. The landscape shots would ' naturally ' include lava (the cooled kind since there were no nearby active flows during my stay). Photographing lava - especially pahoehoe (pah hoee hoee) - would warrant both my circular polarizer and my graduated ND filters. Why? Well, there are a number of amazing lava fields reachable either by trail or car. The Chain of Craters Road heading toward the sea, for example, cuts across some incredible pahoehoe lava fields. The cooled, ropy lava truly looks golden and, as such, tends to create a little glare as the lava reflects the sunlight. A polarizing filter cuts through that glare.
As with shots in other national parks with a lighting difference between horizons, photographing black lava ' either 'a'a (ah ah) or pahoehoe ' often required the use of a grad ND filter for my landscape pics. The cooled lava ranged from deep black to pearly-gray, and my cameras encountered exposure issues trying to decide whether or not to expose for the sky or the ground. Even on an overcast day, the grad ND came in handy, creating a little definition in the gray clouds in addition to balancing that variation between dark land and bright sky.
Photographing Active Steam Vents
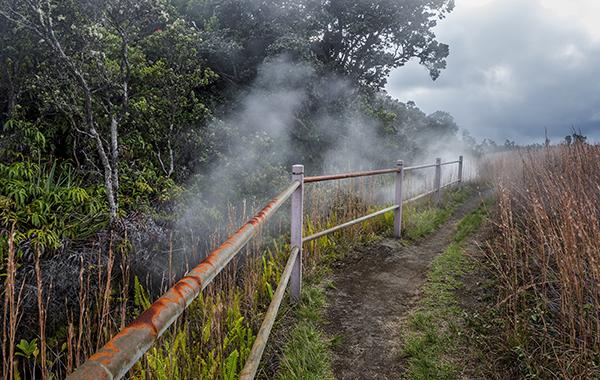
Steam vents and rusty railing, Hawai'i Volcanoes National Park / Rebecca Latson.
Steam vents are a fascinating and very visible indication of the active earth beneath one's hiking boots, and I could barely contain my excitement as I walked along a trail toward a steaming bluff that first day in the park. Stopping to admire a bright red ohi'a lehua blossom, I felt, rather than saw, the moist heat emanating from a trailside hole in the ground. Thus was my introduction to what would be a continuous line of holes and long vents from which billowed forth warm steam, so thick at times that it totally fogged my glasses (and camera lens). Hint: the best time to photograph these vents is after a rain, when the water seeps into the ground, heats up and is 'regurgitated' as thick steam clouds.
Of course, I wanted to grab a composition of the steam itself, as well as its surroundings. I discovered, though, that if I used too fast of a shutter speed, I could barely see the steam when photographing those vents with only a faint wisp emanating forth. I also wanted to give a sense of movement to the steam. To achieve that, I experimented with both my circular polarizer as well as my neutral density filter (different from a grad ND filter). You see, a slower shutter speed means more light coming through the lens; while that brightens up even thin wisps of steam, it can really overexpose the surrounding scenery. Darker filters such as the polarizer or ND filter slow down movement (think 'silky water' shots) without blowing out the lighting in the rest of the image.
If you ever visit this park or any other place with active steam vents (like Yellowstone), remember to wipe down your camera and lens once you return to your lodging. That photo of the rusty railing should give you a good idea of the kind of volcanic particulate matter floating within the steam.
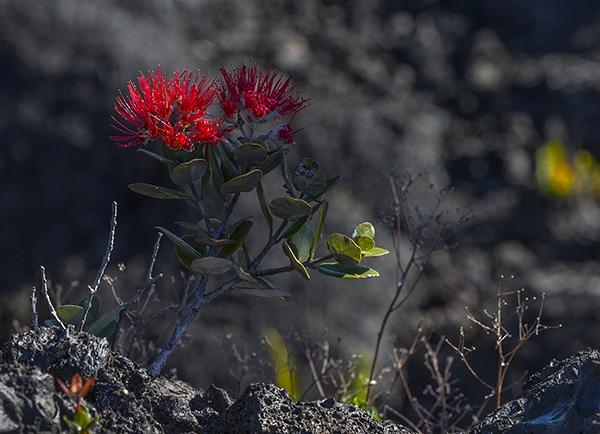
Ohi'a lehua blossoms, Hawai'i Volcanoes National Park / Rebecca Latson.
Photographing Kilauea At Night (Or Very Early In The Morning)
One of the two highlights of my stay in the park (the first was hiking Kilauea Iki Trail) was viewing the steaming Kilauea crater at close range, very early in the morning (note: the actual trail down to the crater rim is currently closed due to high hydrogen sulfide gas, so 'close' is a relative term).
I stayed in Volcano House Hotel and from the restaurant, the hotel's day room, and all along the back of the hotel, one could watch the brilliant, deeply-saturated orange, red and yellow steam issuing forth from the crater at night. I knew I could get closer, though, and the best close-up view of the crater turned out to be located at the Jagger Museum overlook, about 2 miles away from the hotel (by trail or by car).
There's a bit of a challenge with this prime area, though. If you seek a spot for yourself and your camera at the museum's overlook prior to 9 p.m. you won't really see anything except the backs of heads. In my infinite wisdom, I figured if I headed toward the museum around 6 p.m. I would have a relatively decent view of Kilauea crater. By the time I arrived in the parking lot, there was absolutely NO parking space left, and large crowds of people were swarming toward the view area. Disappointed, I drove to another spot further away from the museum and managed to capture some images, but they were not the ones I wanted. Surely, you know the feeling of wanting to get that one photo at that one spot you've been thinking about all day long, right? I returned to my room thinking that was as best I could achieve and I should feel fortunate for that.
I woke suddenly at 3 a.m., threw on my clothes, grabbed camera and tripod, and drove back to the museum. Not a soul was there, the stars were brilliant despite the moon, the breeze was cool, and I had the glowing caldera at that spot all to myself; a totally unfettered view. I spent a magical 1-1/2 hours there, and it was an awesome feeling.
Oh, and here's how I captured the very top image you see in this article. My favorite lens was broken (read the last paragraph to find out what happened), so I affixed my Canon 40mm f2.8 STM 'pancake' lens to my 1DX body. I then had fun experimenting with ISO ranges (800-3200) and shutter speeds (anywhere from 13 -30 seconds). A tripod was an absolute must for this photo session, as well as a noiseware reduction program for editing the resulting photos; high ISO and low light = a 'noisy' (i.e. grainy) image.
Photographing The Park's Flora
I didn't travel to the park just to photograph landscapes and lava. I planned on photographing whatever flowers and other plant life I would see. Hawai'i Volcanoes National Park is not just about the volcano, craters and lava; the park is covered in thick green vegetation, with many plants native to the islands. While I forayed through these forests, I saw lichens, ohelo berries (very tasty but always remember to offer the first berry picked to Pele), the beautiful deep red ohi'a lehua flower, and the amazing fern varieties blanketing the land everywhere I looked.
For my flower and plant shots, I used either the 70-200mm lens, the 24-70 lens or the 40mm pancake lens with the close-up lens filter attached for some pseudo-macro shots. In the post-process stage, I also applied a little bit of vignetting to the edges in order to really bring out my subject (vignetting is not always such a bad thing, except when you are trying to take a wide-angle landscape photo).
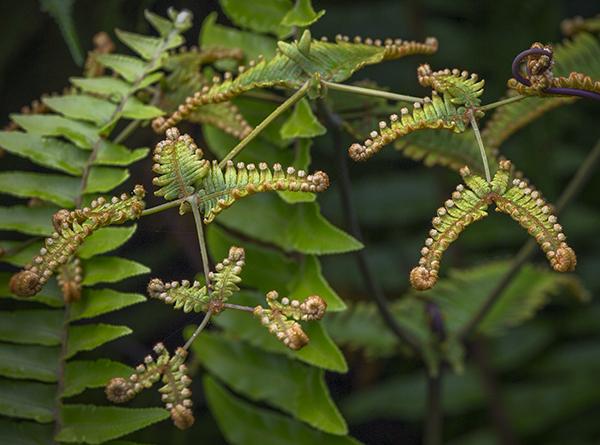
Curlicues, Hawai'i Volcanoes National Park / Rebecca Latson.
One Last Thing To Remember
If you visit this national park, remember to take a heavy tripod with you; one that will withstand strong winds. Don't even think about taking one of those light little travel tripods that pack well in your suitcase but tremble at the slightest touch when all set up. I give you this very hard-earned piece of advice. I was using what I thought was a relatively hefty tripod, but a gust of exceedingly strong wind blew it and camera to the ground (I now know just how intricate the components are in a camera lens). Because I could only berate myself for so long before realizing I was crying over spilt milk, I decided to chalk it up as a (expensive) sacrifice to Pele for such a great week otherwise.
Speaking of the goddess Pele, do make sure to thank her for the amazing photos you will capture when you visit this incredible national park.
Aloha!
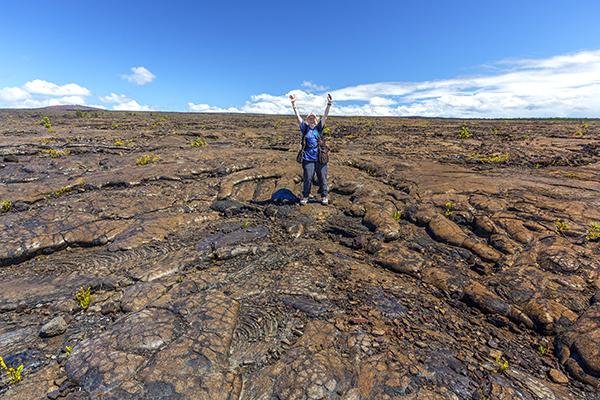
Standing in a golden field of pahoehoe - a hard-earned shot, Hawai'i Volcanoes National Park / Rebecca Latson.


Comments
To beat crowds at the Jaggar Museum, it is not necessary to come in the middle of the night. Just step out of the overlook and walk a short distance to the left, with the additional benefit that some Ohia trees can serve as foreground.
Ah, QT, my early-morning sojourn at Jagger was magical and I wouldn't trade it for anything!