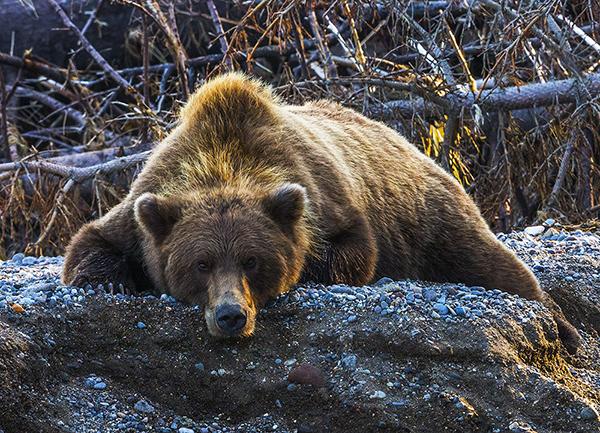
Watching me/Rebecca Latson.
Per my first Traveler article for 2014, I reserved a spot on a tour with eight other photographers to fly to Lake Clark National Park and Preserve, Alaska, in August, to photograph the bears. I've returned from an awesome trip and have a little something to say about photography there.
Having spent a week in Alaska back in 2013, I was more or less acquainted with the kind of weather and photographic conditions I might experience during this year's trip. Alaska is not like California, where it's sunny and clear for the majority of the year. No, Alaska (at least, during August) is a mix of mosquitoes, sun, shade, fog, clouds, rain, cold, and hot (maybe even some snow, depending upon elevation) all in a single day! Therefore, it was no big surprise to find these atmospheric conditions in Lake Clark; I just needed to remember to pack - in addition to my raingear and fleece pullover - the camera's raincovering as well as the polarizing and grad ND filters, not to mention the other items, which (more or less) fit into either my camera pack (Lowepro Flipside 500 AW) or my laptop case:
- Canon 1DX body
- Canon 5D Mk III body
- Canon 500mm f4L II lens (rental)
- Canon 100-400mm lens
- Canon 24-70mm lens
- Canon 16-35mm lens (could have left this one at home since I used it maybe once during the trip)
- Memory cards, extra batteries, chargers, 2 portable hard drives, 2 memory card storage devices, filters, lens caps, laptop, etc.
Photographing the Bears, Eagles, Porcupines, Harlequin Ducks, etc.
For wildlife photography in Lake Clark National Park, you really should lug tote the following: a super-prime or super-telephoto, such as the Canon 500mm I rented (or such as the Canon 200-400mm with built-in teleconverter that another photographer on the tour used), another telephoto such as the Canon 100-400 or 70-300, and ' believe it or not ' a wide-angle lens like the Canon 24-105 or 24-70.
The telephotos are self-explanatory, but why on earth would I use a wide-angle lens for wildlife? Two reasons: 1) sometimes the wildlife was within spitting distance (ok, maybe within 30 feet) and my super-telephoto had issues focusing on subjects so close, and 2) sometimes, the wildlife was off in the distance where the animals were better served as part of an entire landscape composition rather than just a spotlight view where you would need to do a fair bit of cropping to get a closer look at the critter.
Photographing Everything Else
For landscape and close-view photography, either a wide-angle or telephoto lens works; yes, even a telephoto can give the photographer a great landscape. Here's an example: during a foggy day with a dearth of bears and other wildlife, we took a short hike along an actual bear trail into a brilliant green forest full of little mushrooms, ripe berries (yum), and bear hair attached to trees against which the great bruins had scratched their backs. Exiting the forest, we emerged into a golden field dotted with ponds, tall spruce, blankets of fog, and a couple of harlequin ducks floating in one of the ponds. The telephoto lens worked well for close-ups of the forest details, as well as closer views of the overall landscape and of course, the wide-angle lens worked well for those wide golden field shots.
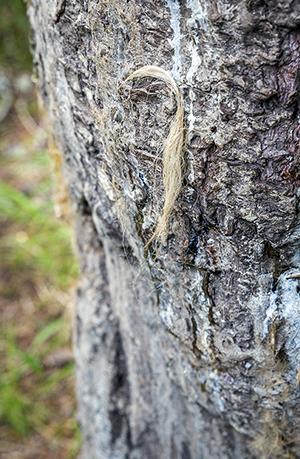
Bear hair against a tree on a bear path in the forest/Rebecca Latson.
Foggy / Overcast Days
Our first half-day and next full day produced fantastic weather, golden light, blue sky and lovely clouds during the 'golden hours' just after dawn and before sunset. The days following, though, brought 'iffy' weather in the form of dense fog rolling in from Cook Inlet. These conditions required a change of camera settings as well as mindset in order to get the shot.
Fog tends to create a sort of 'fuzzy veil' between the lens and subject. As such, details are not seen as crisply as they would be on a clear day. While the fog created an otherworldly atmosphere conducive to dreamy landscapes, it also created challenges to getting a clear shot of the bear(s). In reality, most of the improvements to my foggy-scene photos occurred post-process.
What did I use for those foggy days? Well, I could have ditched the polarizing filter I constantly kept on my lens (too difficult for me to change without dropping it out in the field, so I compensated with adjustments to the camera settings). And I didn't use my grad ND filter, either. I played around with my camera settings quite a bit in the attempt get a relatively clear shot of the bear despite the whiteness of the fog.
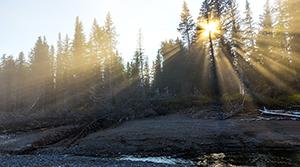
Sun and fog in the forest next to Cook Inlet/Rebecca Latson.
Still, most of my improvements came during the editing stage. Not much help here, am I? I'm not that experienced with wildlife and foggy weather, so the main thing to realize is that there are times when you simply need to play around with your settings ' preferably *before* you start photographing the wildlife. I always took practice shots to see what the exposure looked like prior to aiming toward the bears; the nice thing about a digital camera and the LCD is that you can immediately see the results of your exposure settings.
Other Tips for Photographing Wildlife
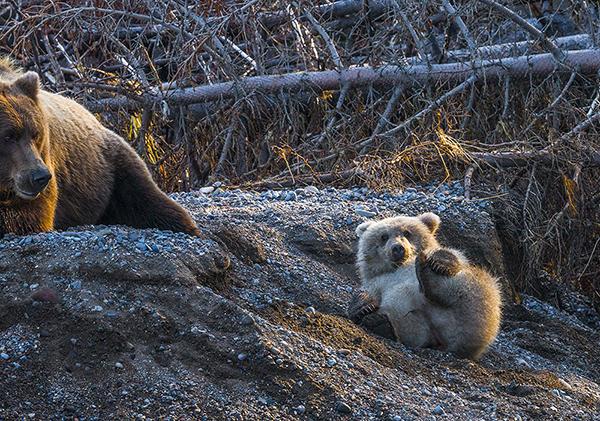
The bears were constantly on the move, either walking toward or away from us, rough-housing, or moving their heads as they looked at us, each other, the water, etc. This meant a fast shutter speed was absolutely necessary to clearly capture the movement since a delay of just a split-second meant the difference between getting a lovely shot of a cub playing with its momma or the two of them just looking at each other before moving on. In fact, a fast shutter speed was necessary both for sunny as well as overcast days.
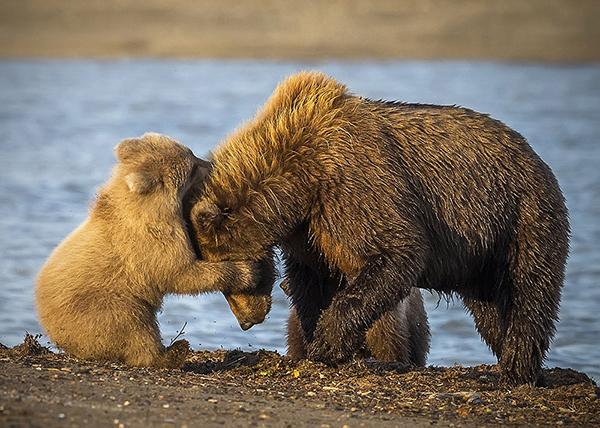
A hug for Momma/Rebecca Latson.
How do you get a fast shutter speed without under-exposing your image on what might be an overcast, foggy day (or even a sunny day)? High ISO. The higher the ISO, the faster you can set your shutter speed.
F-stop? I kept it around f16. Why? Well, for most of our stay, the stars of the show were a sow and her two spring cubs. Oftentimes, they were seen together, with the sow in front and the cubs a little bit behind. Since you want your DOF (depth of field ' remember a previous article I wrote discussing this?) to be long so that *everything* is in focus, and not just the foreground subject, you need to have a relatively small aperture (the bigger the f-stop, the smaller the aperture opening). Of course, this all means that you need a relatively high ISO of between 1600 and 3200 in order to allow enough light in to the composition even with a very small aperture opening. This, in turn, means you probably need some sort of noiseware removal to reduce the graininess (aka 'noise') of the photo. Aack! Clutters the head, doesn't it?
OK, at least you now know that if you ever venture out to an Alaskan national park (or any national park, for that matter) for bear photography, either by yourself, with a guide, or with a group, you will, hopefully, be a bit better prepared after reading this article than you might have been before.
Now, go forth and photograph those bears!


Comments
Hi. Thanks for the article. Have started some bear photography in Glacier NP. Do you shoot in RAW or JPEG? Both? Does RAW processing help with reducing grain, especially at such high ISOs?
Thanks.
Hello mtgnppics! I soooo apologize for not getting to you sooner. Sometimes I forget to check and see if there are any comments to my articles. Anyway, to answer your question, I shoot only in RAW because I get way more data with a RAW image than with a jpeg. I know, it's that old argument about RAW vs. jpeg and it all comes down to personal choice for each photographer. That being said, I still shoot in RAW, even though it does take up alot more space on the memory card. I have the RAW image and use both Lightroom and Photoshop to process images - there are some tools that are easier for me to utilize in Lightroom than in Photoshop, and vice versa. I also use Layers, which allows me to edit a photo without screwing up the original image. I save that image as a TIF file, but also as a high-res jpeg as well as a email-sized jpeg. Alot of work, I know, but then I am able to use that image for whatever is needed. For my website, for instance (for printing enlargements and such), I use only the high-res jpeg. For articles like this one, I use the smaller-sized jpeg. Regarding grain, I use a noise reduction plug-in for Photoshop while the image is a TIF file. I don't know if there is a difference in noise between a RAW and a jpeg because I am only working with the RAW at the time I reduce the noise. Hope this information helps you.
Thanks, Rebecca! As always, useful information - and some great photos :-)
Dittos Jim.